

Air Guitar

We’ve all heard of the game, Guitar Hero, whereby players use a guitar-shaped game controller to simulate an actual guitar. In this instructable, we’ll teach you how to make your very own customisable guitar controller paired with micro:bit! You’ll never have a silent moment again in the house! So let’s get started!
You will need:
Block Editor Link
Hex File Download
1x BBC micro:bit
1x micro USB cable
1x AAA battery cage
2x AAA batteries
1x Mini Speaker
1x Roll of double-sided tape/mounting tape
1x Glue gun
1x Ruler
1x Penknife
3x Pairs of wooden chopsticks
2x Alligator clip wires
2x Set of screws and nuts
copper tape
decoration materials
cardboard
3D Printer
Instructions
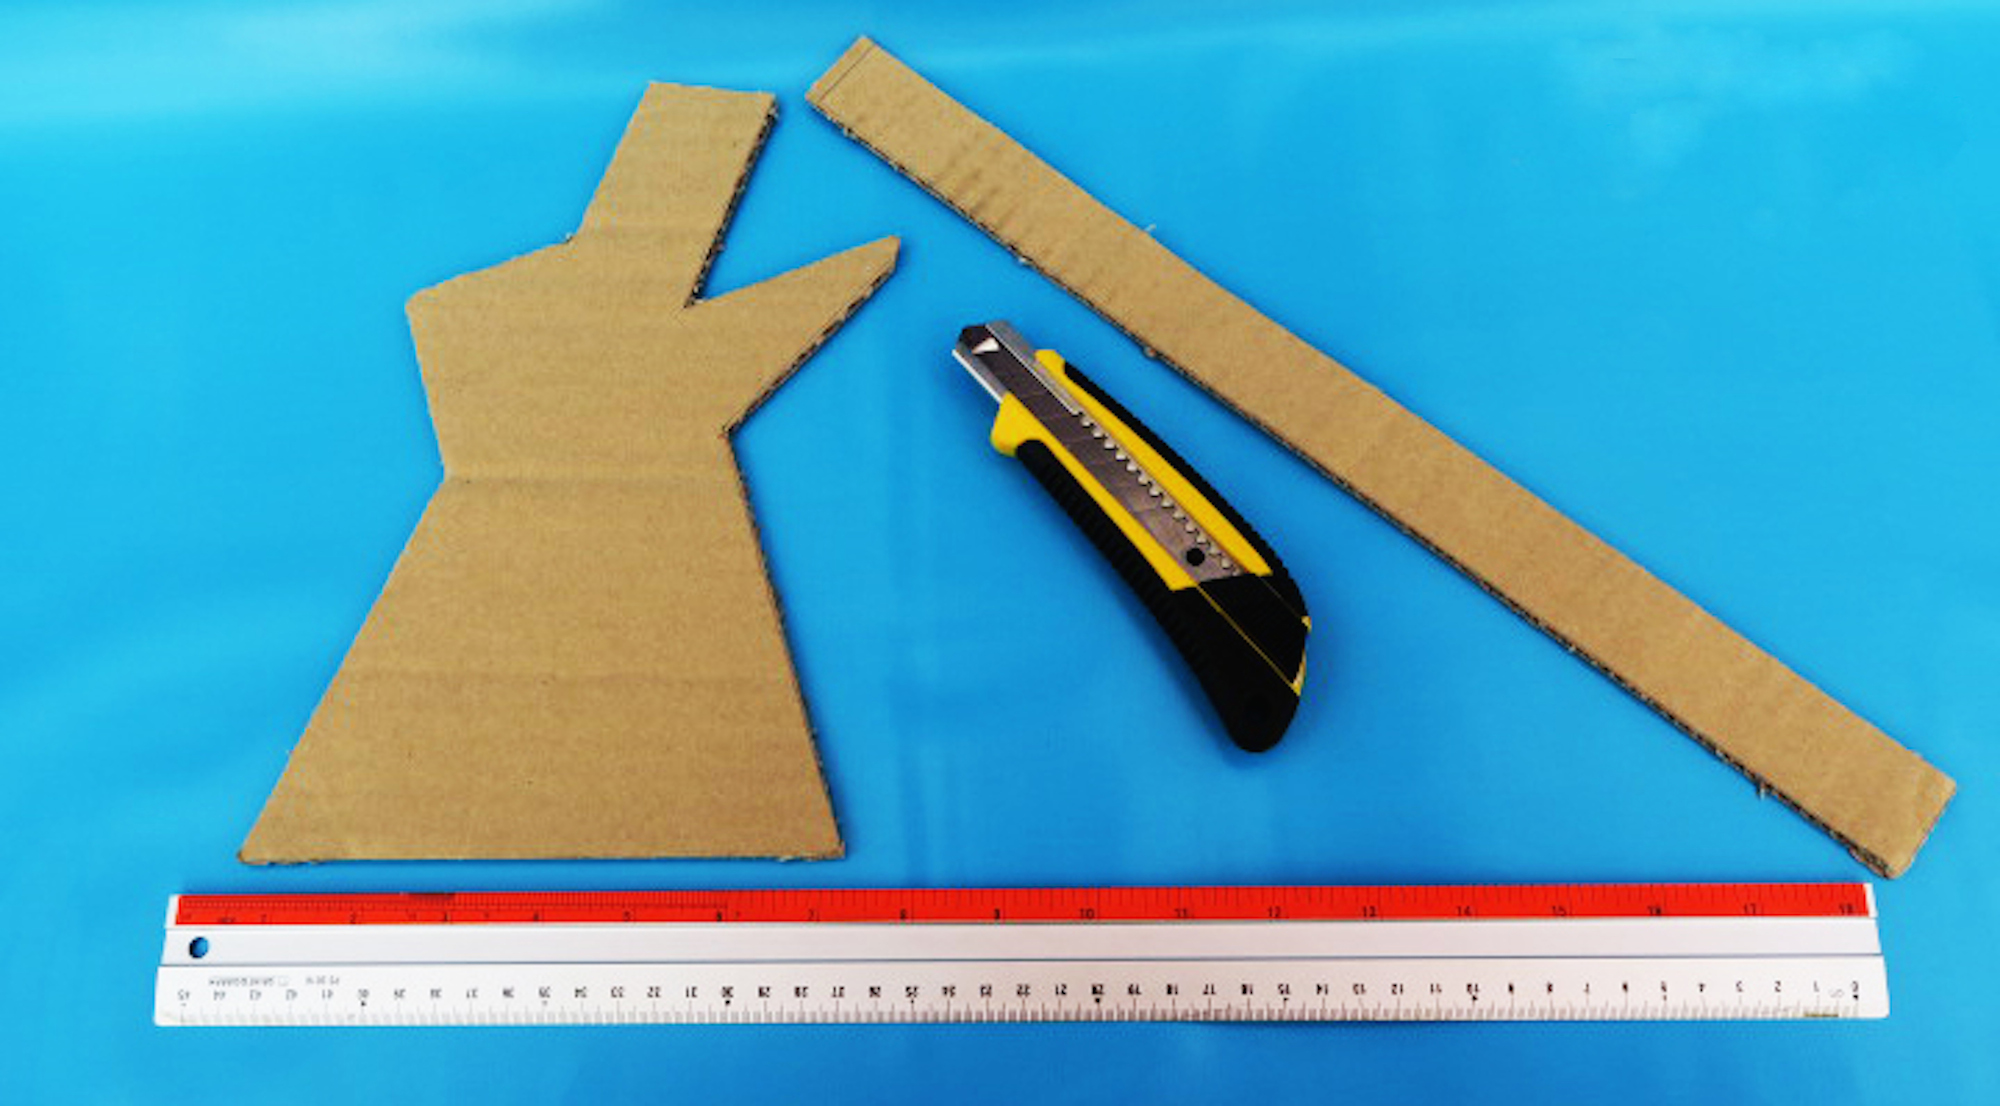
1. Cutting Outline of Air Guitar
Use a penknife/scissors to cut cardboard into 2 pieces of guitar shape, and 3 side straps. Dimensions are given for reference.
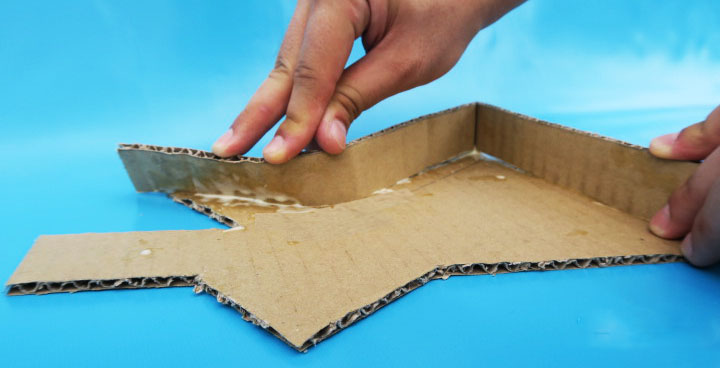
2. Glue Side Straps to add Height
Bend the side straps on the edge of one guitar body, and glue them together. Once done, glue the other guitar shape piece on top to get a full bodied cardboard guitar frame.
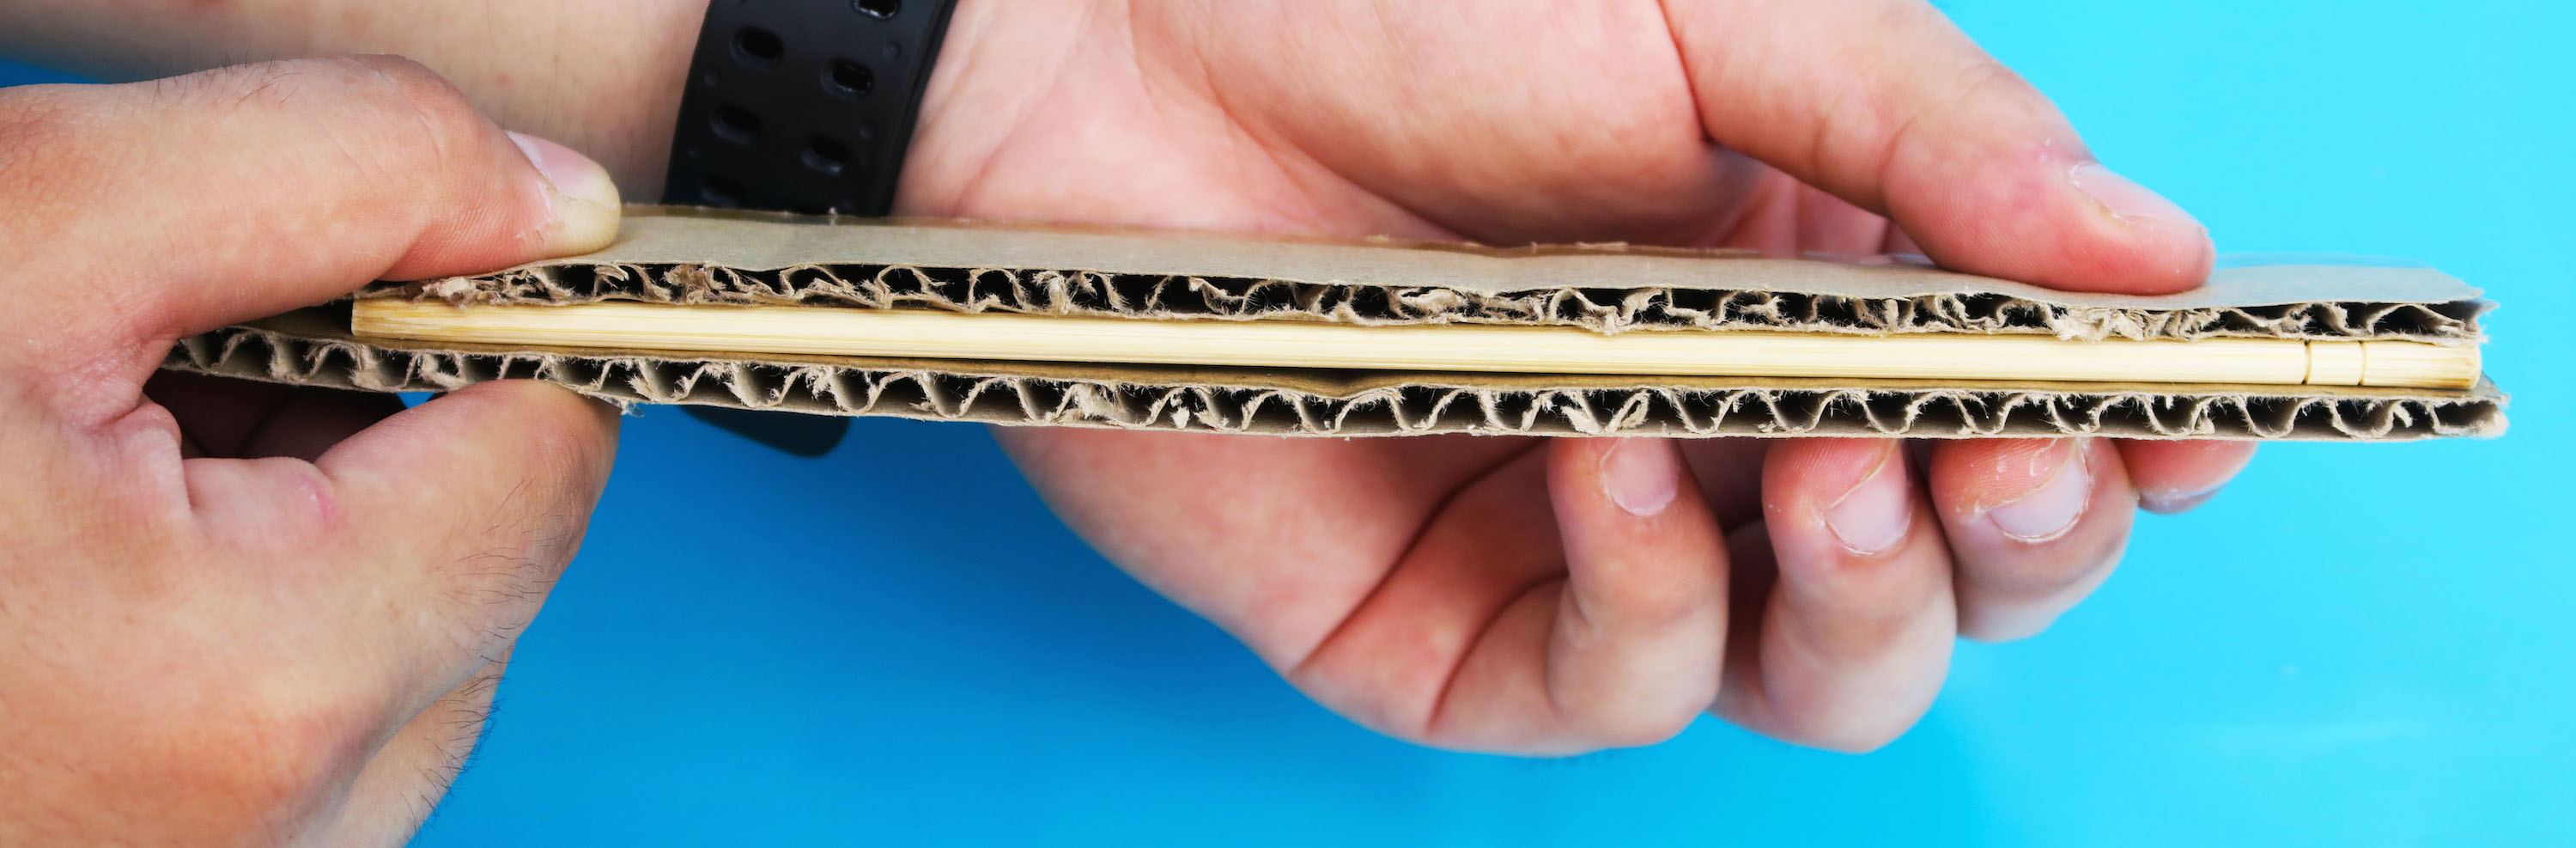
3. Attach Guitar Neck
Next, we will make the neck of the guitar. Cut out 2 straps of the neck piece at dimension of 28x4cm. Put 3 pairs of wooden chopsticks in between the 2 straps, and glue them together. This is to provide a strong support for the guitar neck.
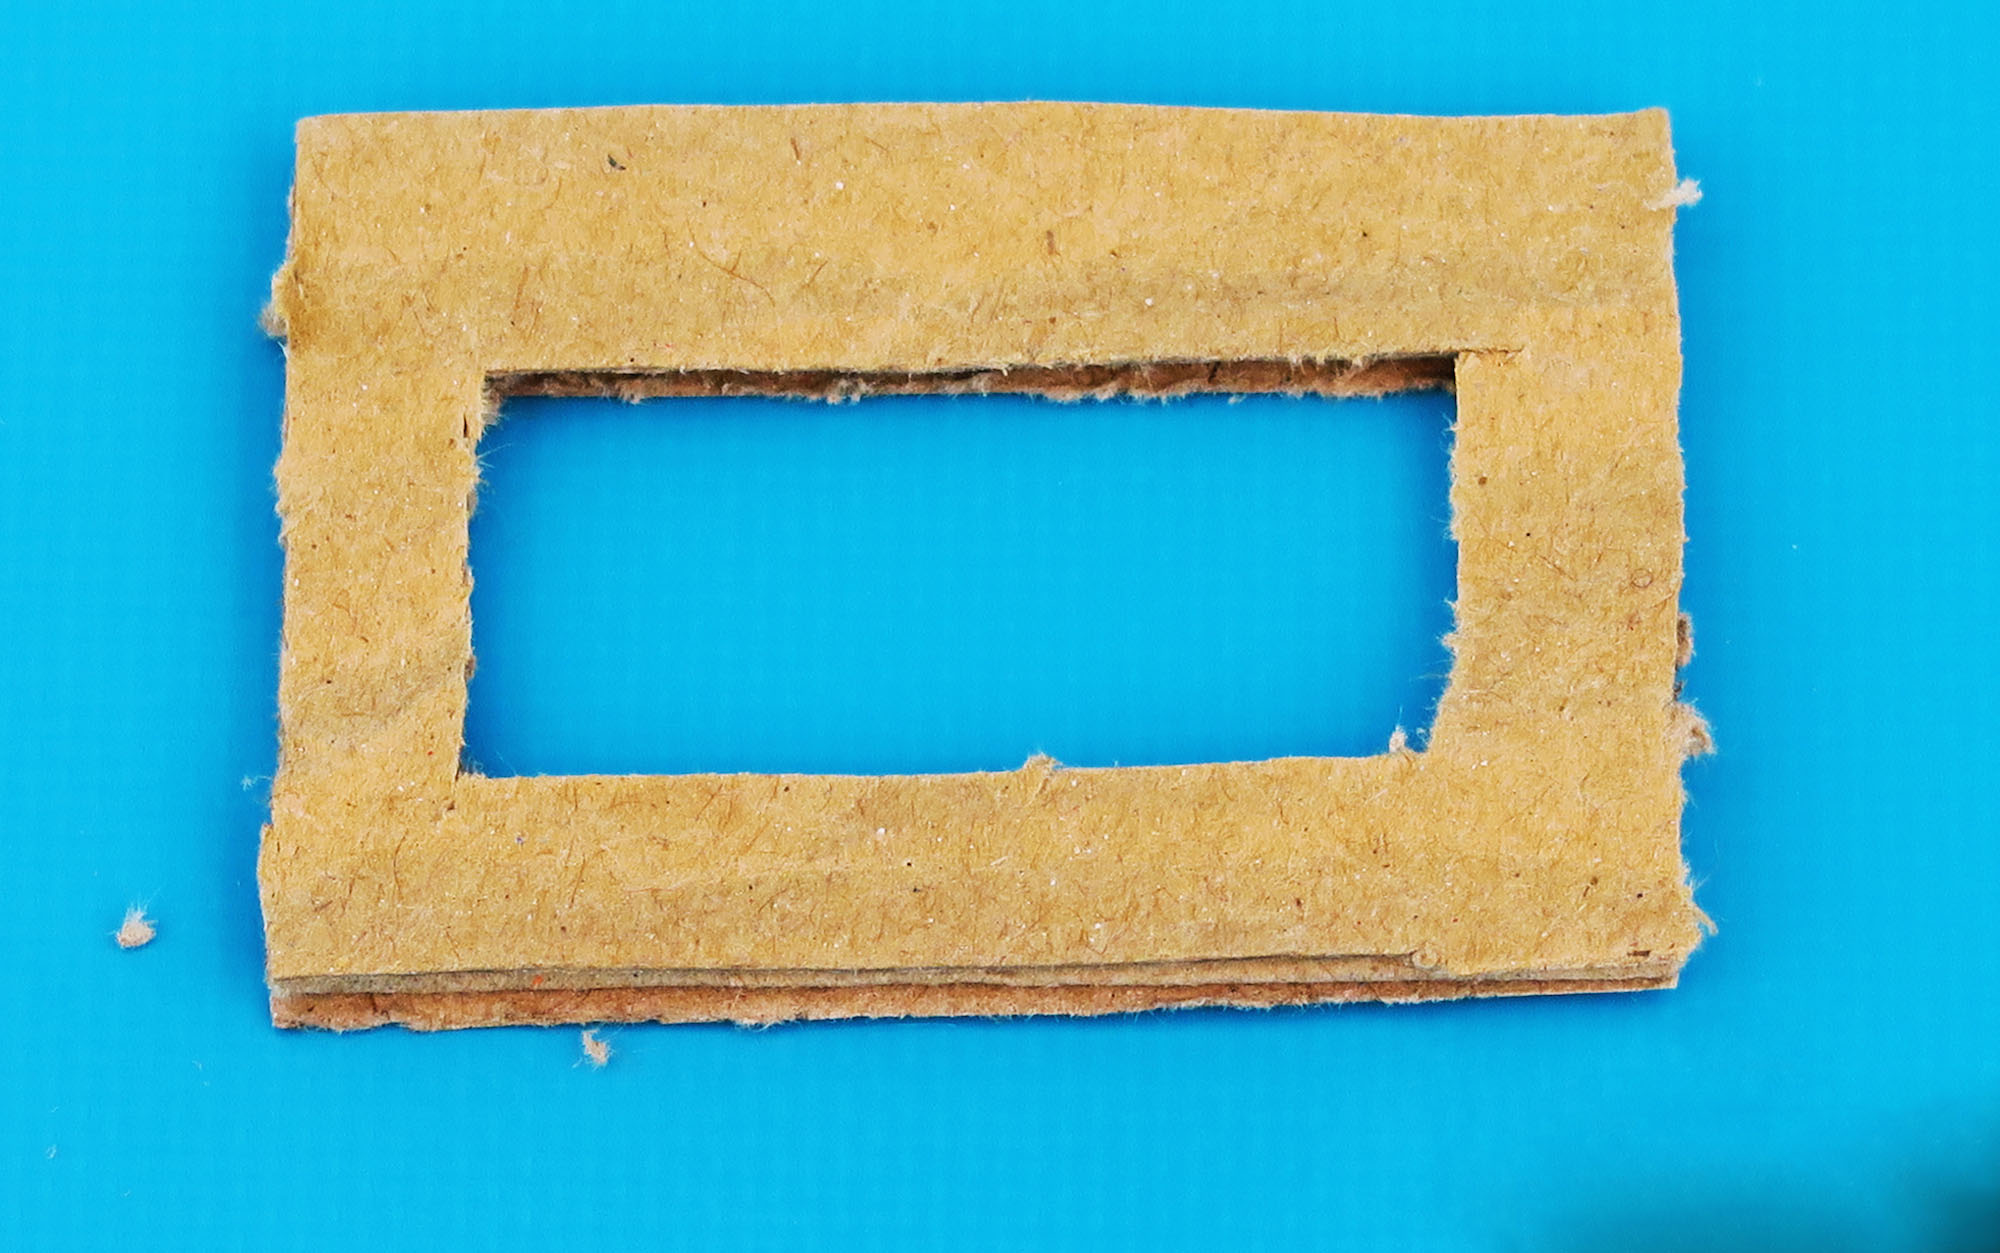
4. Cut slot for Guitar Neck
Cut out the body top cover of 5x3.5 cm, and cut a slit of 4x1.5cm in the centre to slot in the neck later.
5. Attach
Glue the cover on the top of the guitar frame. The product should look like the picture on the right.
6. Slot in Guitar Neck
After slotting in the neck portion, you may apply glue for added reinforcement. Product should look like the picture on the right.
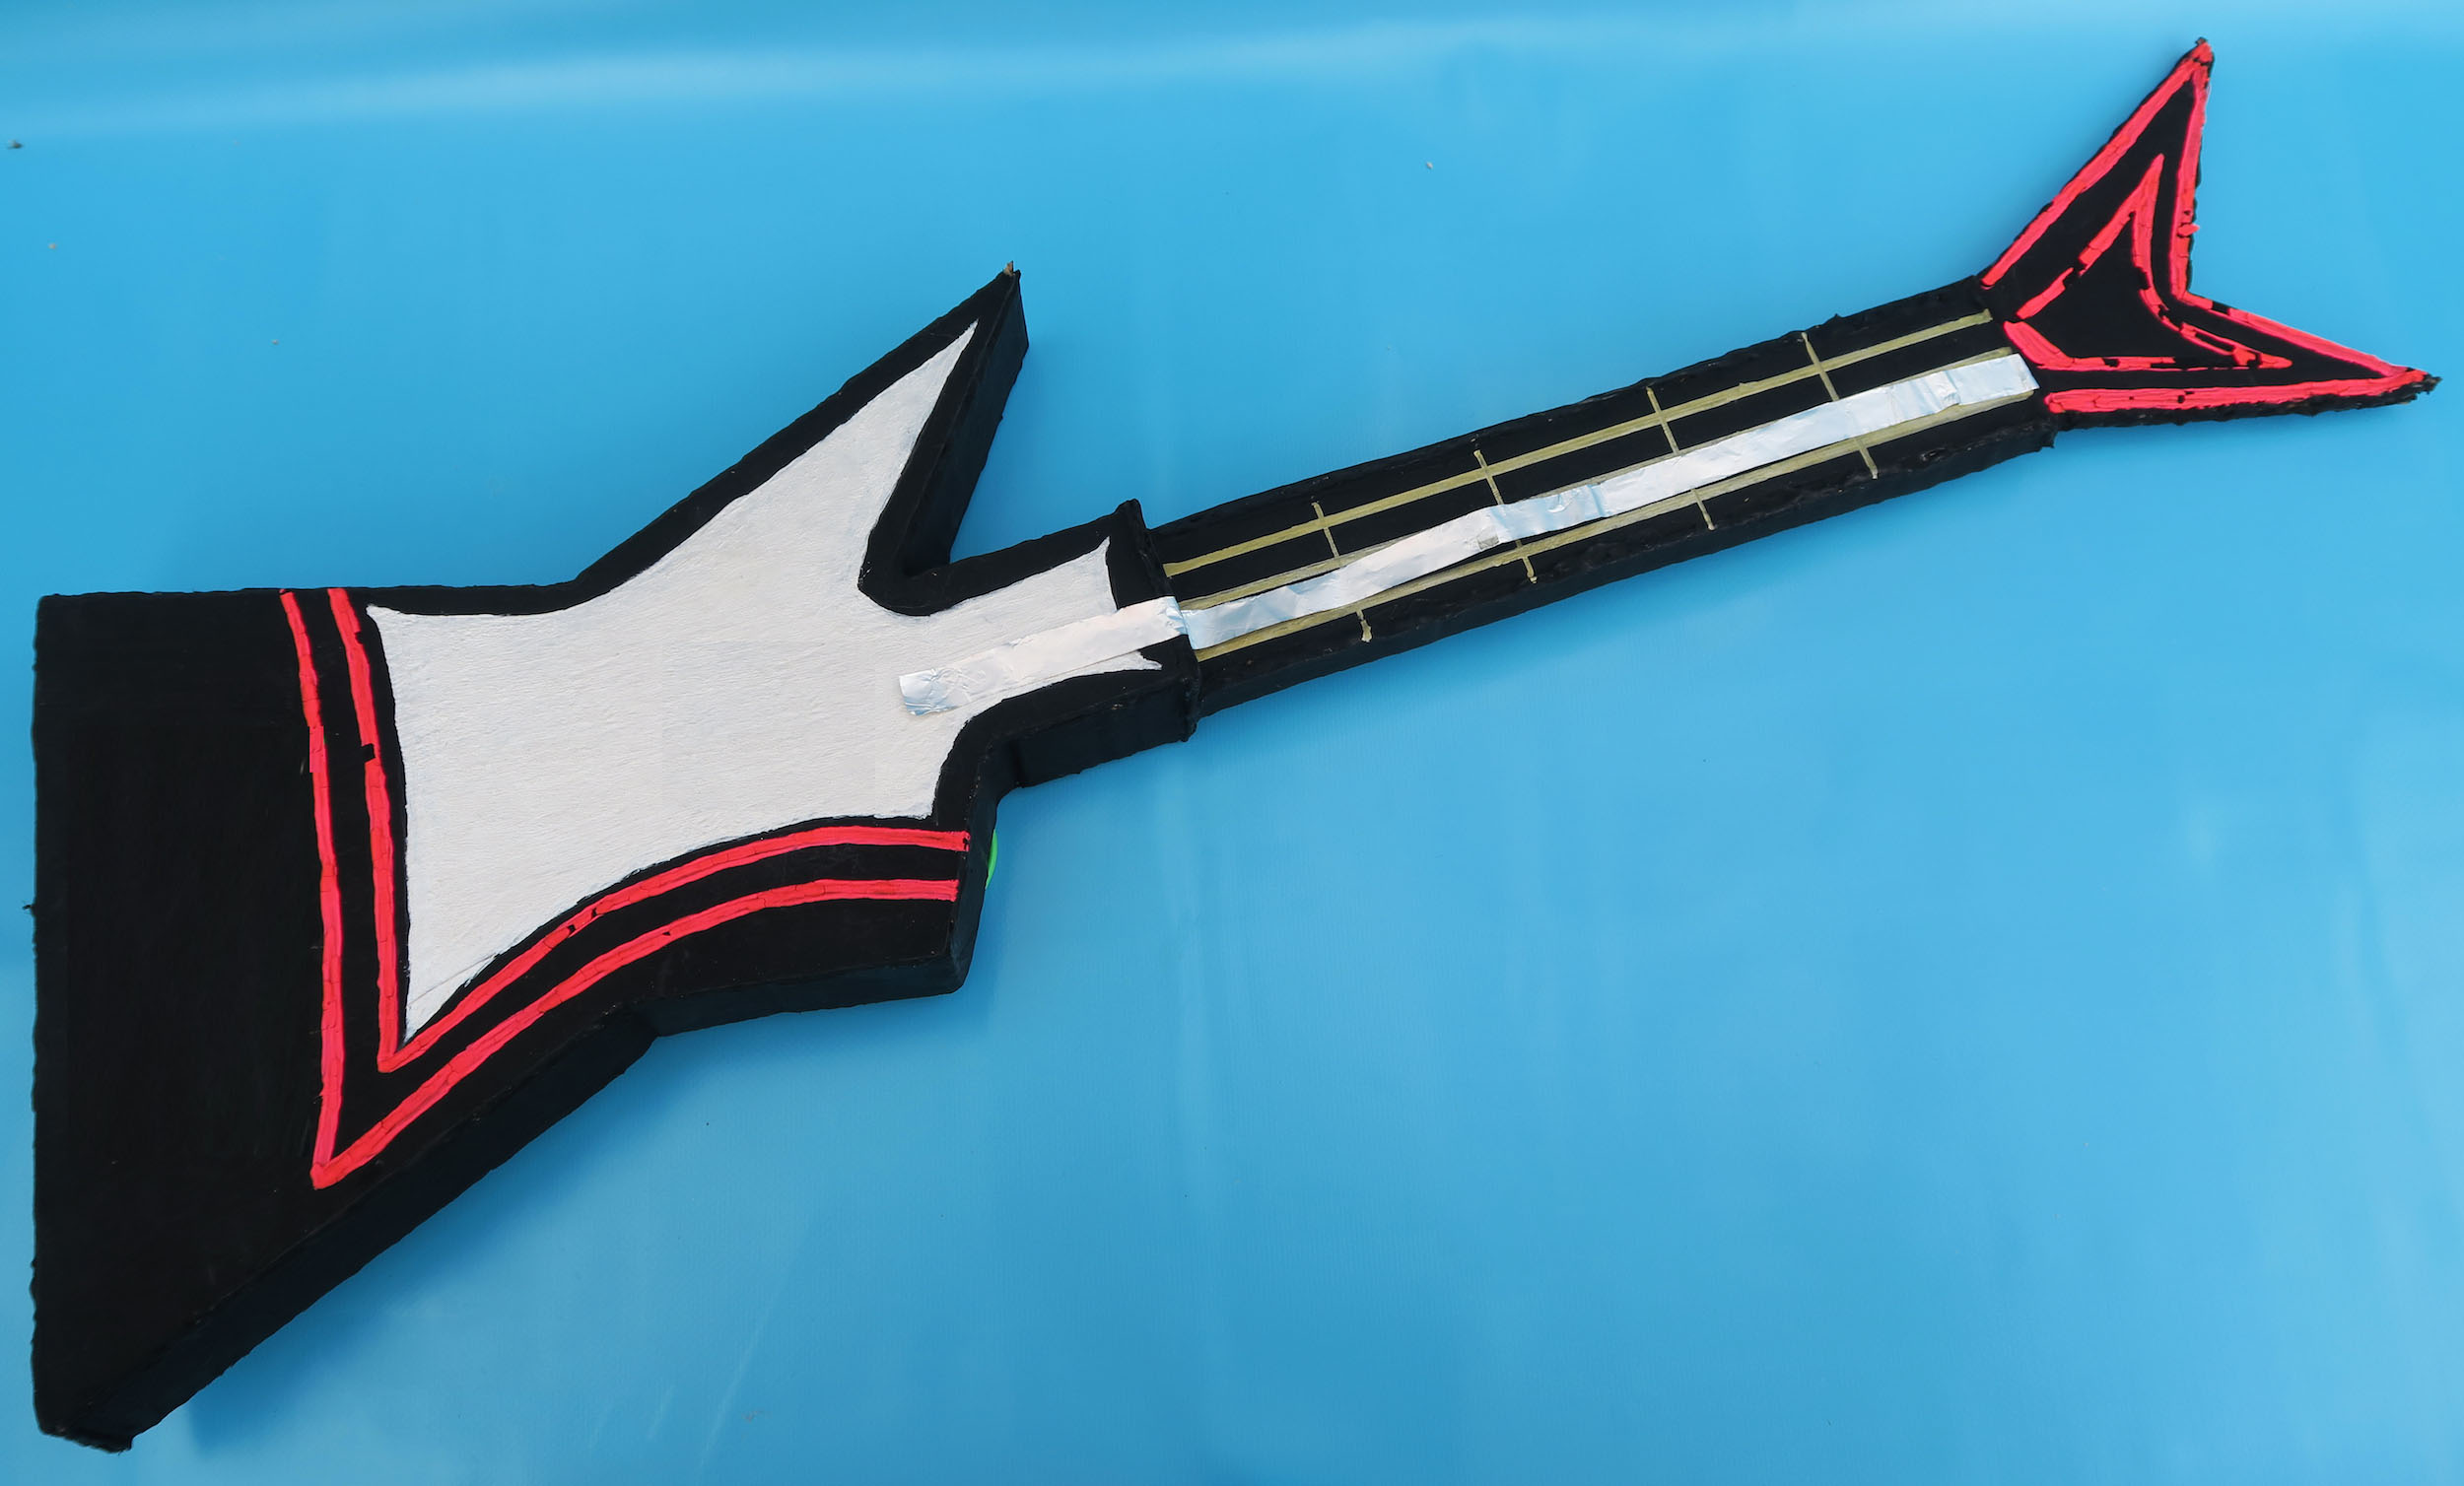
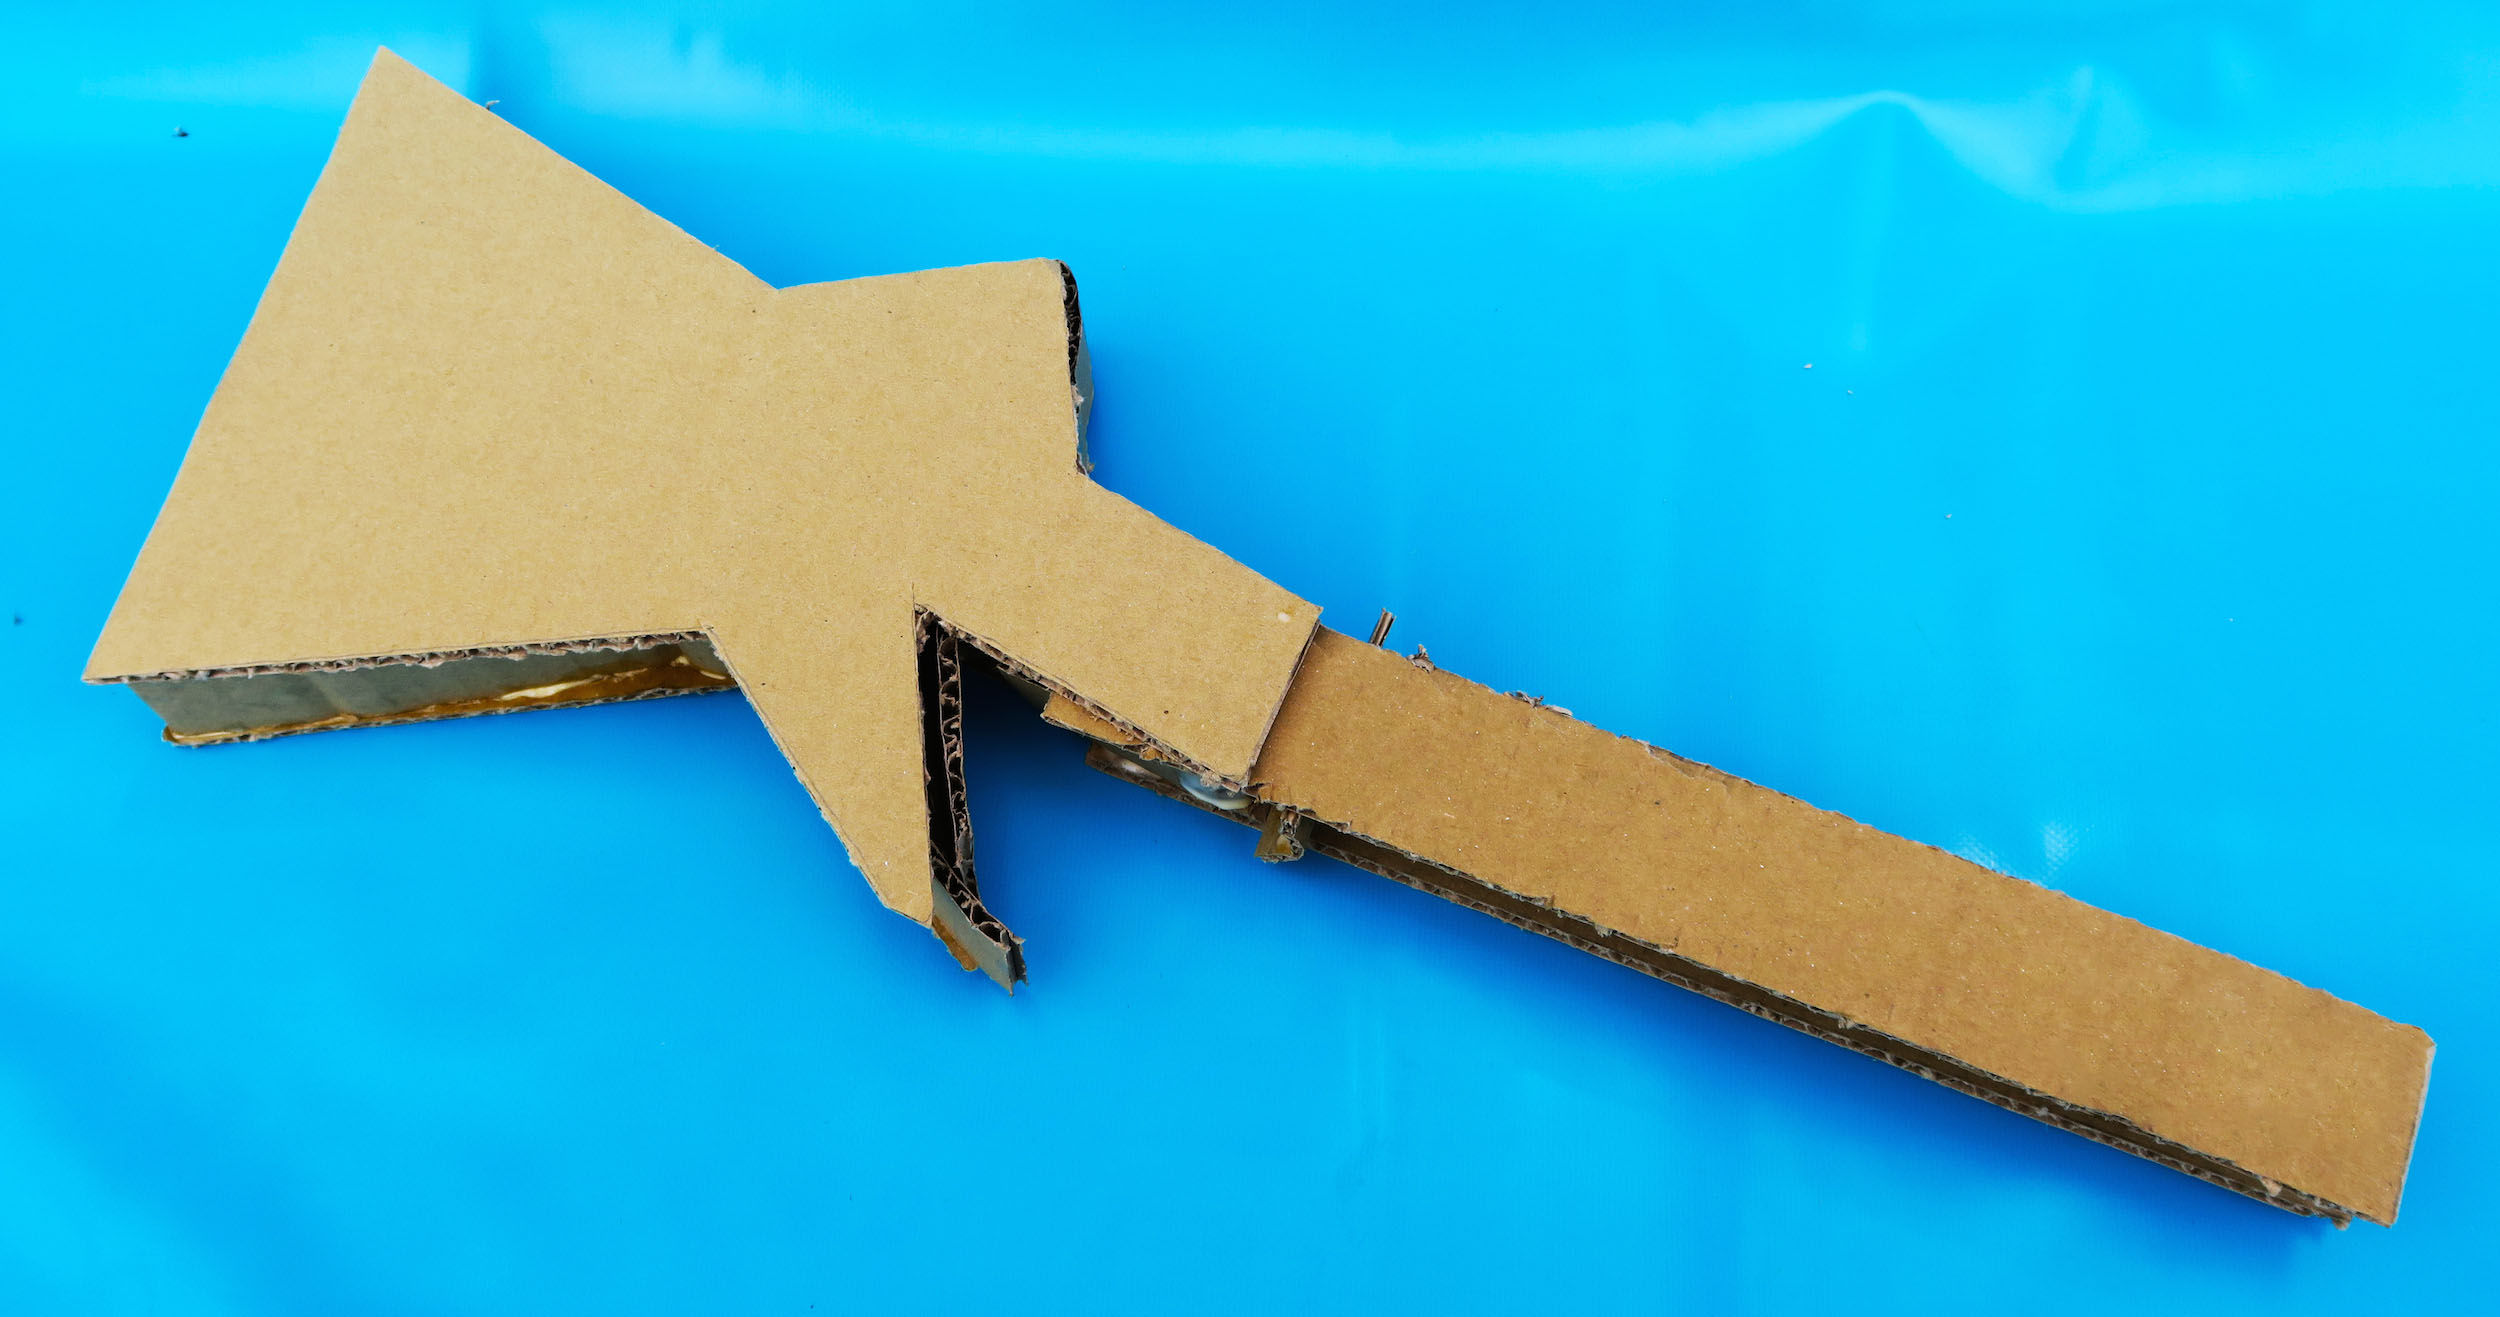
7. Design and Print
Cut 2 identical pieces from the cardboard to form a guitar head, and glue them together. Insert the head into the guitar neck, and glue the connecting edge between the neck and head. You’ll now have a finished guitar design. Start decorating it with your art materials!
8. Coding the Program
In this step, we will code the Micro:bit in Block Editor. You can access the block editor from the captions below. In this project, we will program the guitar to play some pre-programed melodies by pressing onto buttons and changing its pitch by tilting the guitar in certain angles.
Begin by coding an unique starting screen, this screen will appear when the micro:bit is powered on.
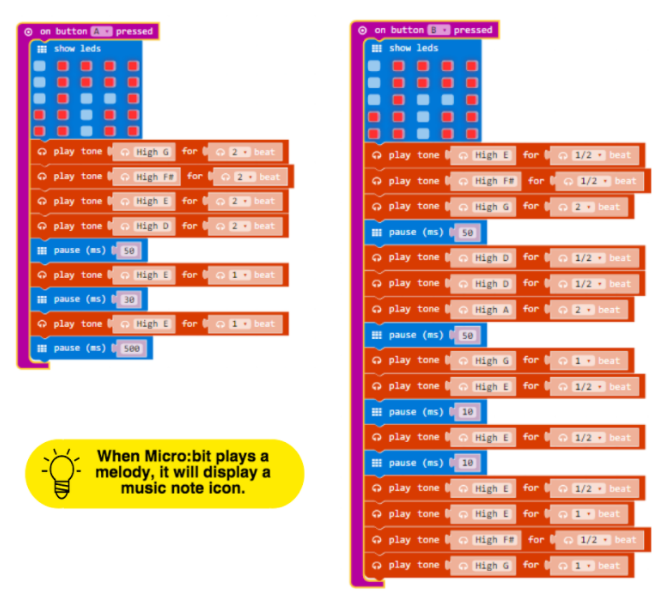
9. Setting Melodies
Next, we can program the Micro:bit to play different melodies when pressing either Button A or B. We’ve programmed button A to play “We Will Rock You” when pressed while button B plays “Let It Go” (Frozen).The images on the right will show the codes required for both button A and B. Feel free to create your own song if you wish to!
10. Final Coding Step
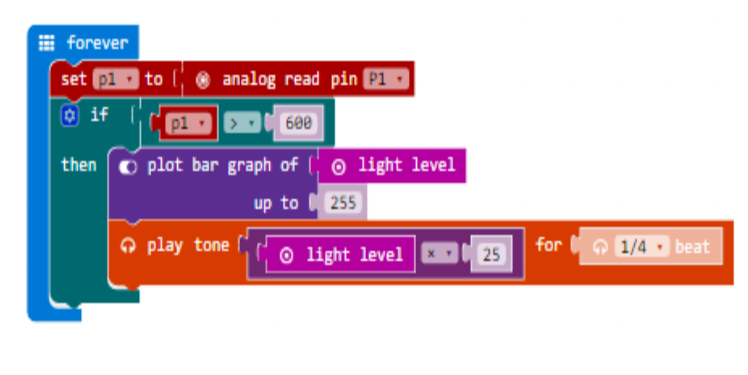
Let’s make a mode whereby Micro:bit produces a sound when tilting. This mode will be triggered by pressing on Pin1. Rename a variable “pin1” to read the analog signal from Pin1, and this variable will decide if Pin1 is pressed.
In this project, the pitch is controlled by the light level and it is detected by the Micro:bit in-built light sensor.
We can code the Micro:bit to plot graph according to the light level as well.
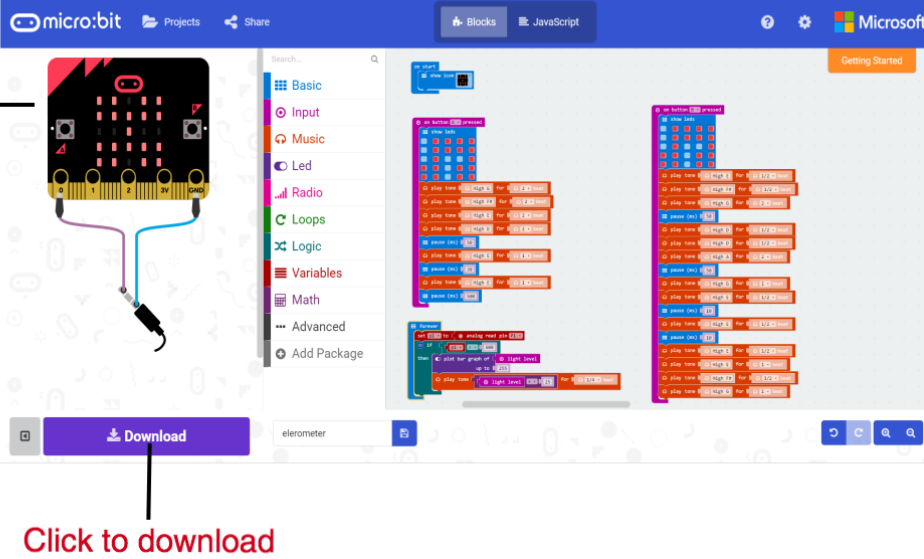
11. Transfer code into Micro:bit
After all the coding is done, we can use the simulator on the left to try out all the functions we have programmed. Plug in the micro:bit to your computer, download the script and copy it onto the micro:bit. Copy the downloaded script to your micro:bit drive. The downloaded script ends with a .hex extension.
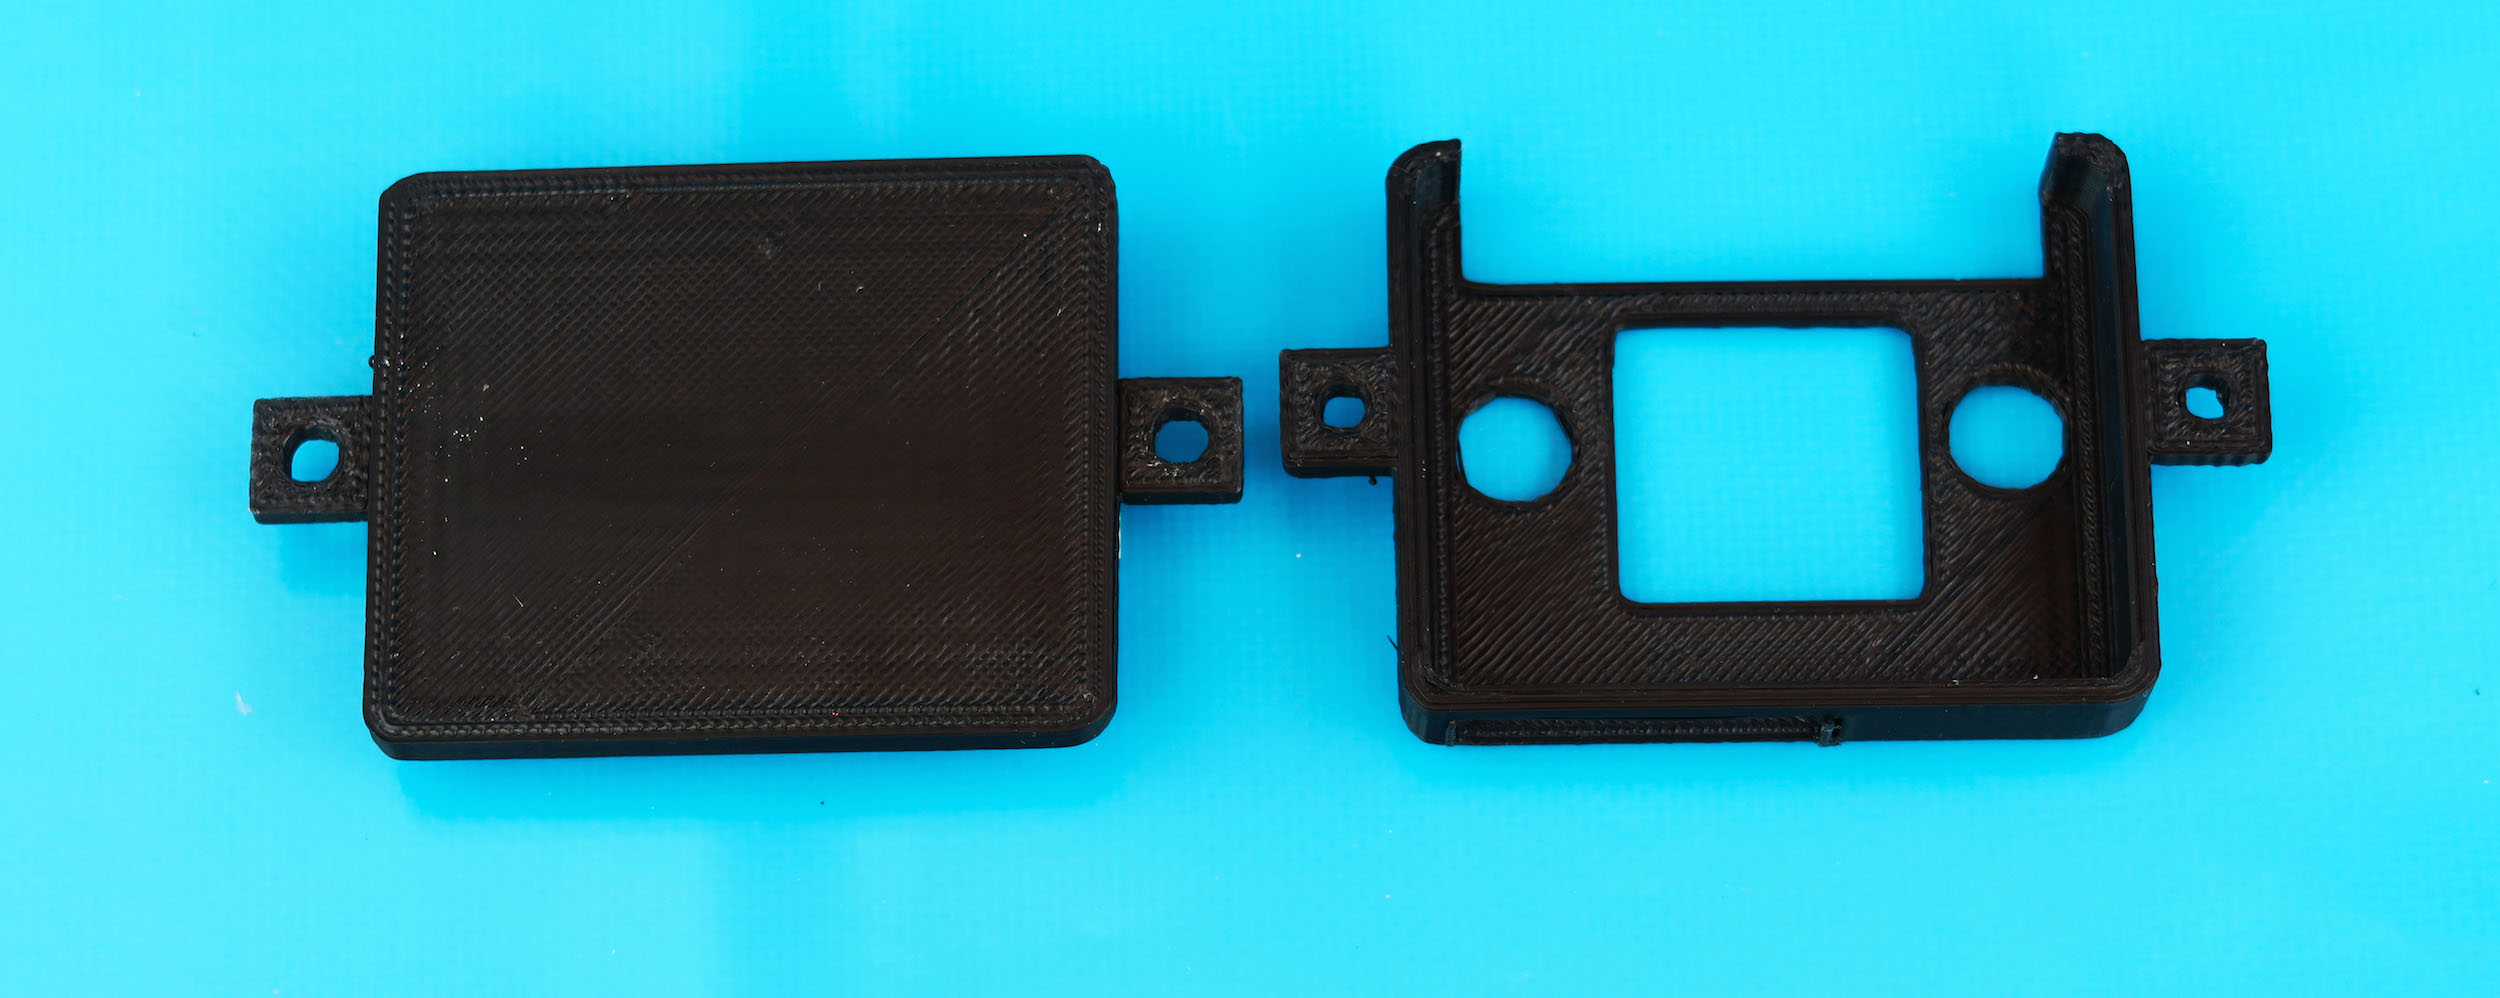
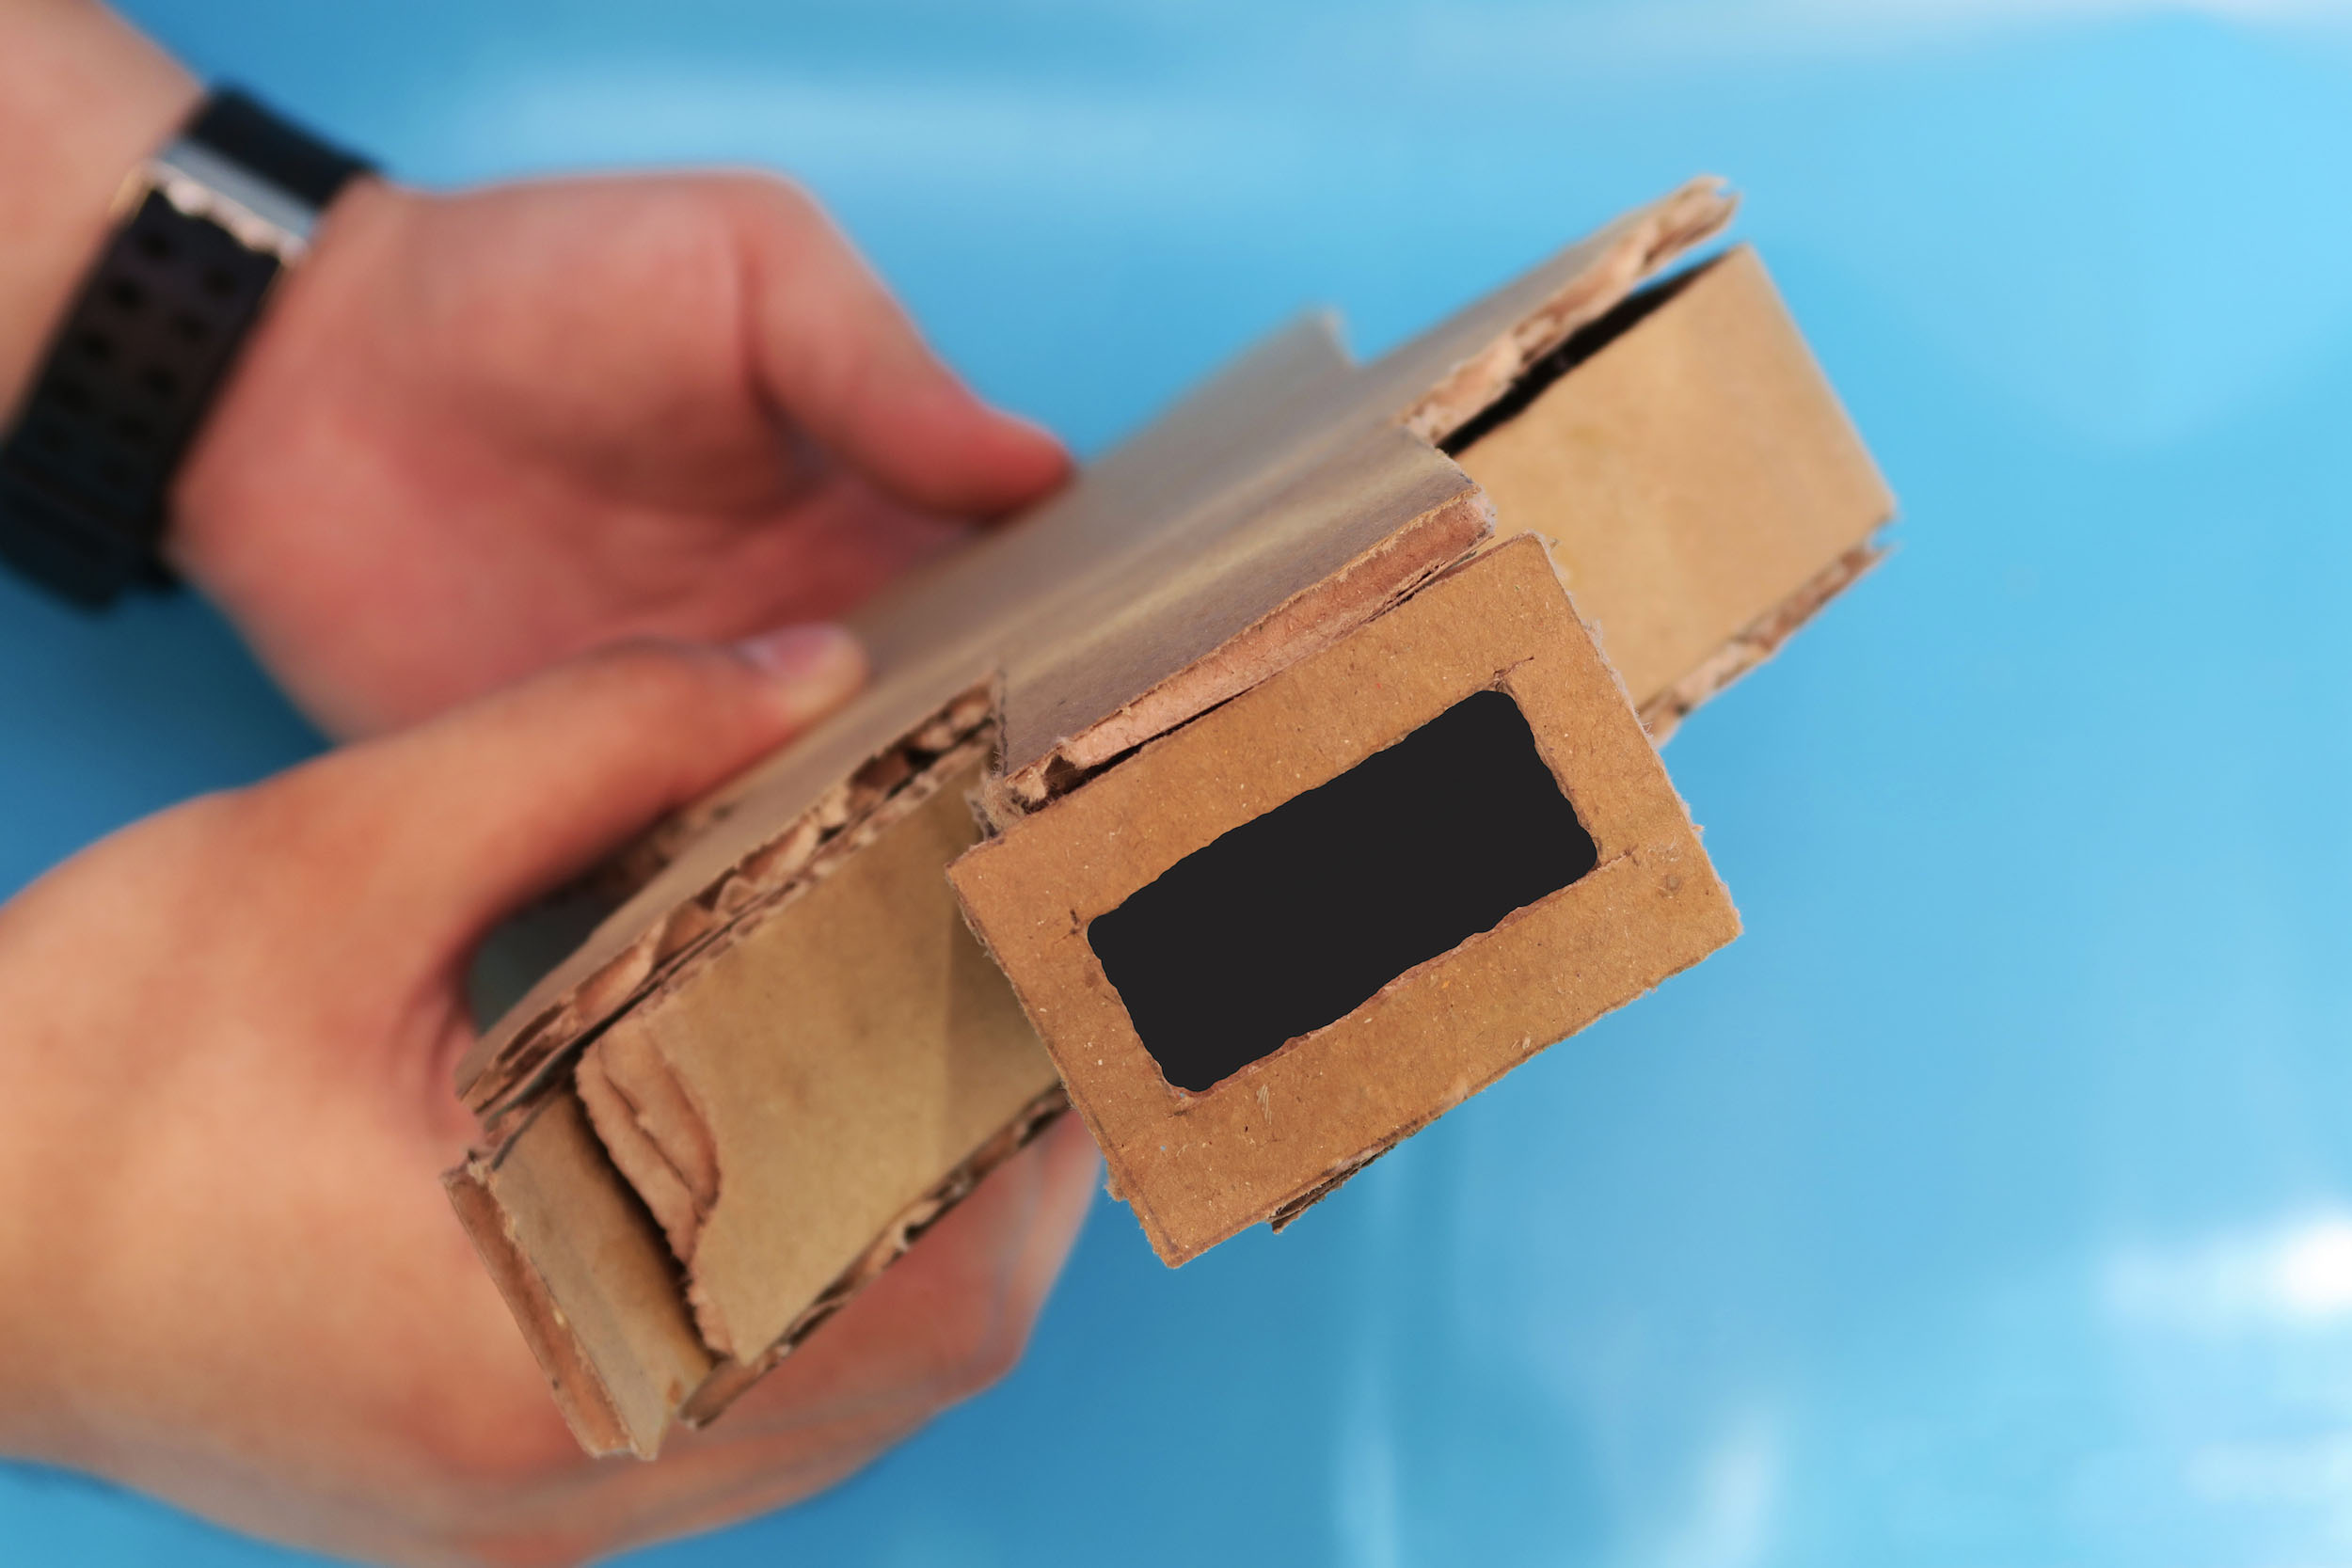
12. 3D Print Micro:bit Cover
In this step, we are going to 3D print the Micro:bit cover.
The link for the 3D design will be in the captions below. After you download the model, use your 3D printer to print them out.The final Micro:bit cover should look like the image on the right.
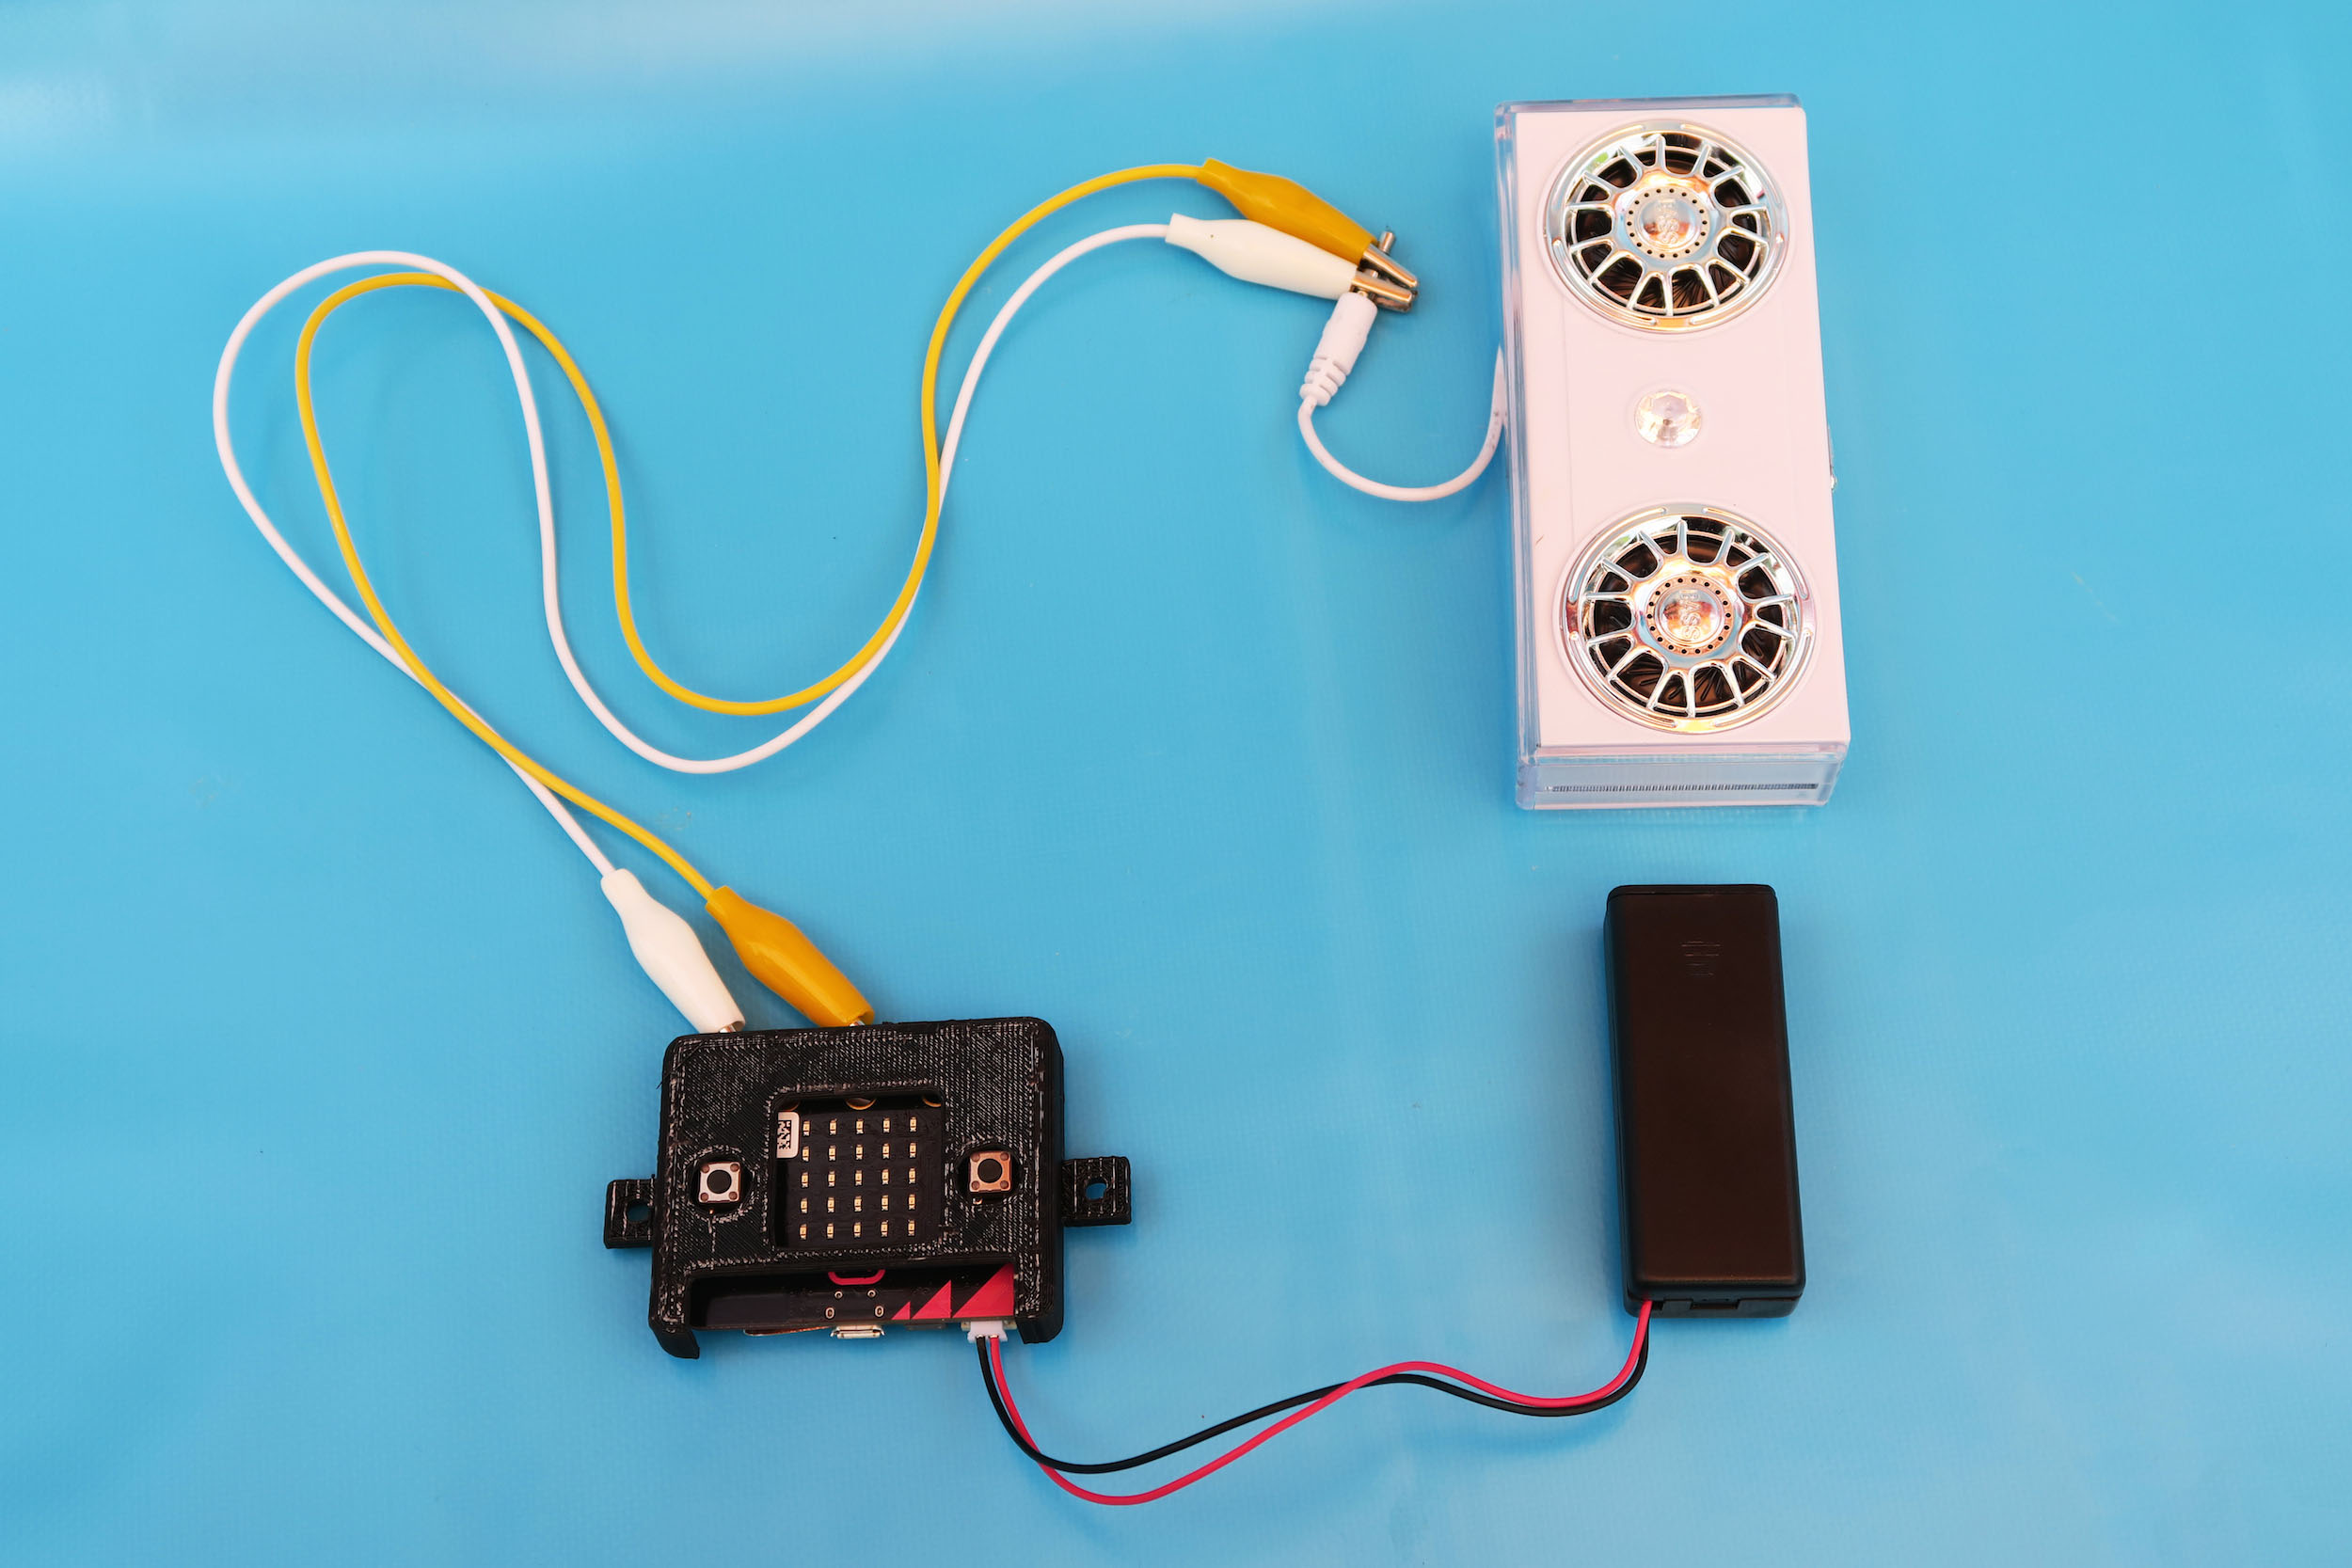
13. Connect Micro:bit to audio speaker
Place the programmed Micro:bit into the printed cover, and use a pair of screw and nut to secure the cover. Connect the Micro:bit with batteries. Take 2 alligator clip wires to connect Micro:bit with the audio cable of mini speaker. You can refer to the image on the right if you’re unsure of the wiring.
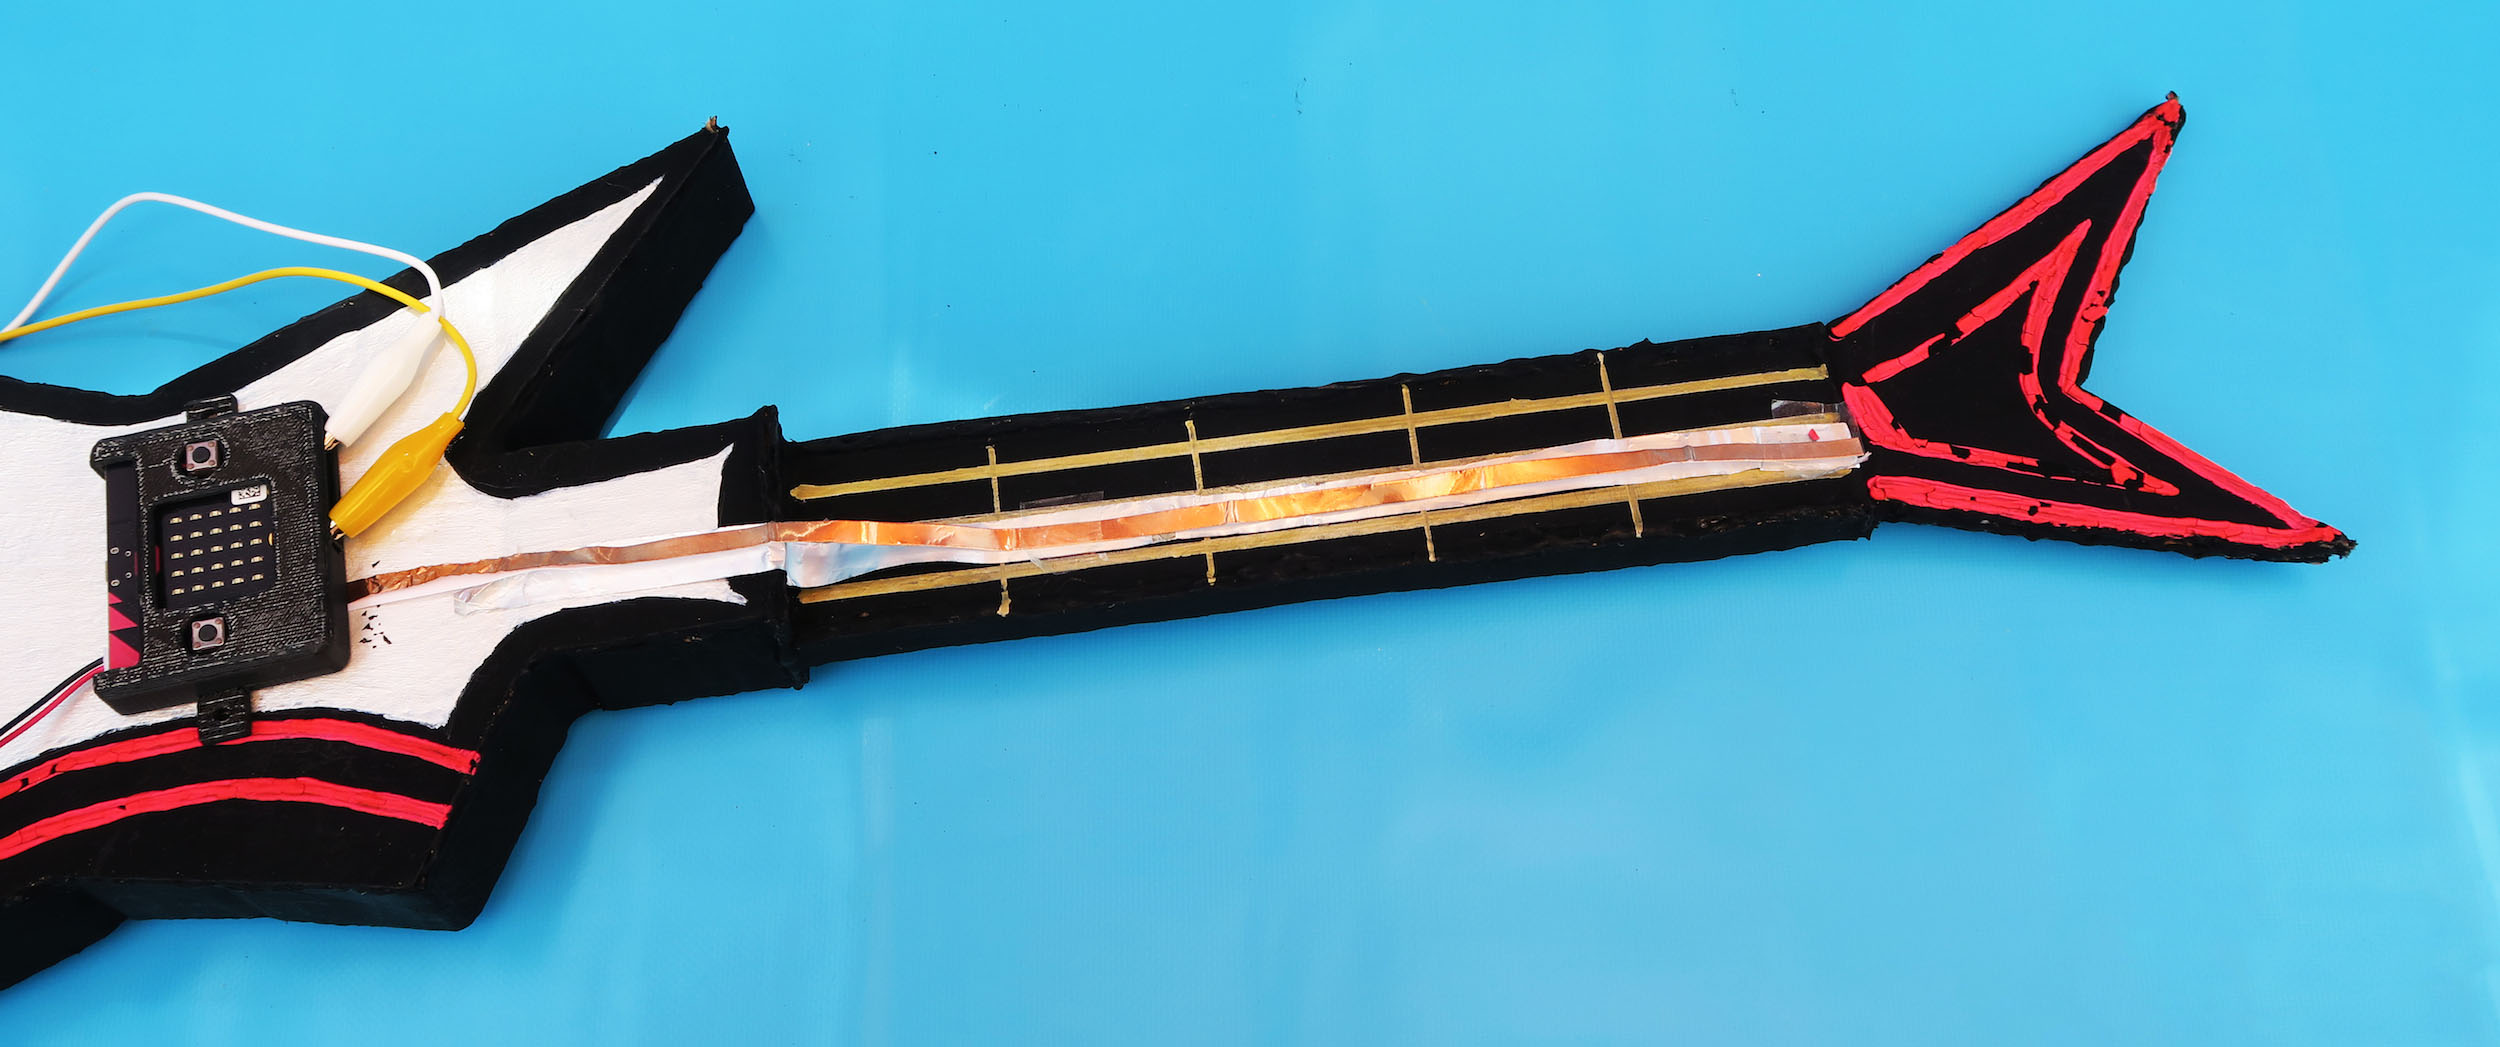
14. Extend Pin1 onto Guitar Neck
In order to press Pin1 easily, we can extend Pin1 out to the guitar neck. Use a long strap of aluminium foil, and tape in from the guitar to the neck.
Paste conductive copper tape on the top of the aluminium foil, paste one end to Pin1 on Micro:bit. In this way, you press Pin1 by pressing the copper tape on the guitar neck.
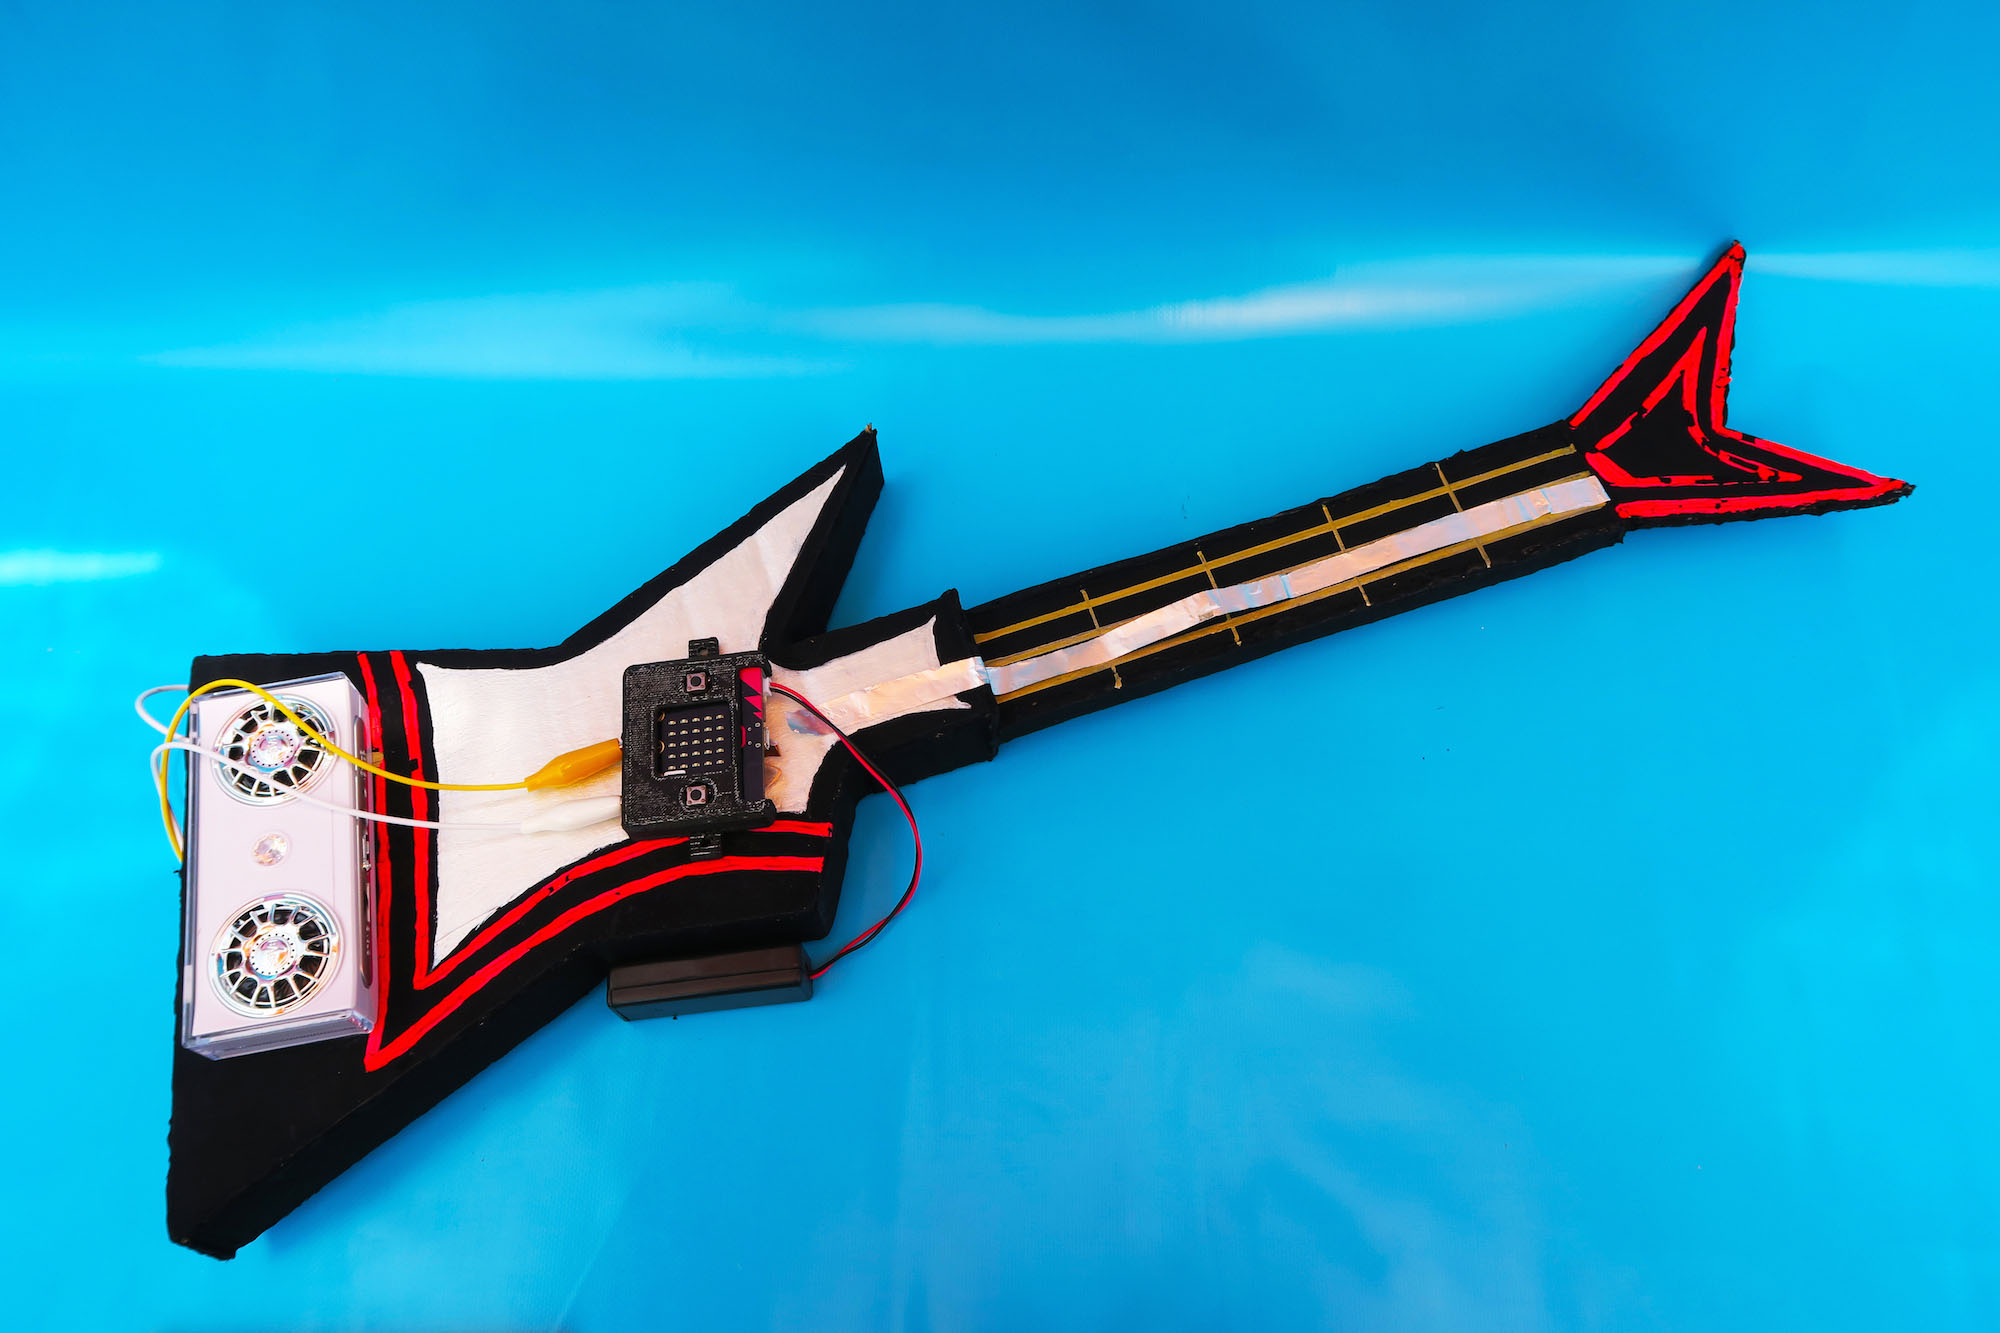
15. Complete
Andddd you’re done! You now have your very own Micro:bit Air Guitar. Go forth and test the capabilities of it! Have fun!
Click here to go back to the Digital Maker Projects By Community main page.