

Jump Rope Counter
Jump rope is a great calories burner exercise that most people can take part in. It’s a holistic workout that enables the individual to burn more than 1000 calories an hour, but also strengthening your legs, butt, shoulders and arms. What better way to keep track of your jump rope workout with a jump rope counter! Never again will you lose track of the amount of jumps you’re able to complete in an hour!
You will need:
Block Editor Link
Hex File Download
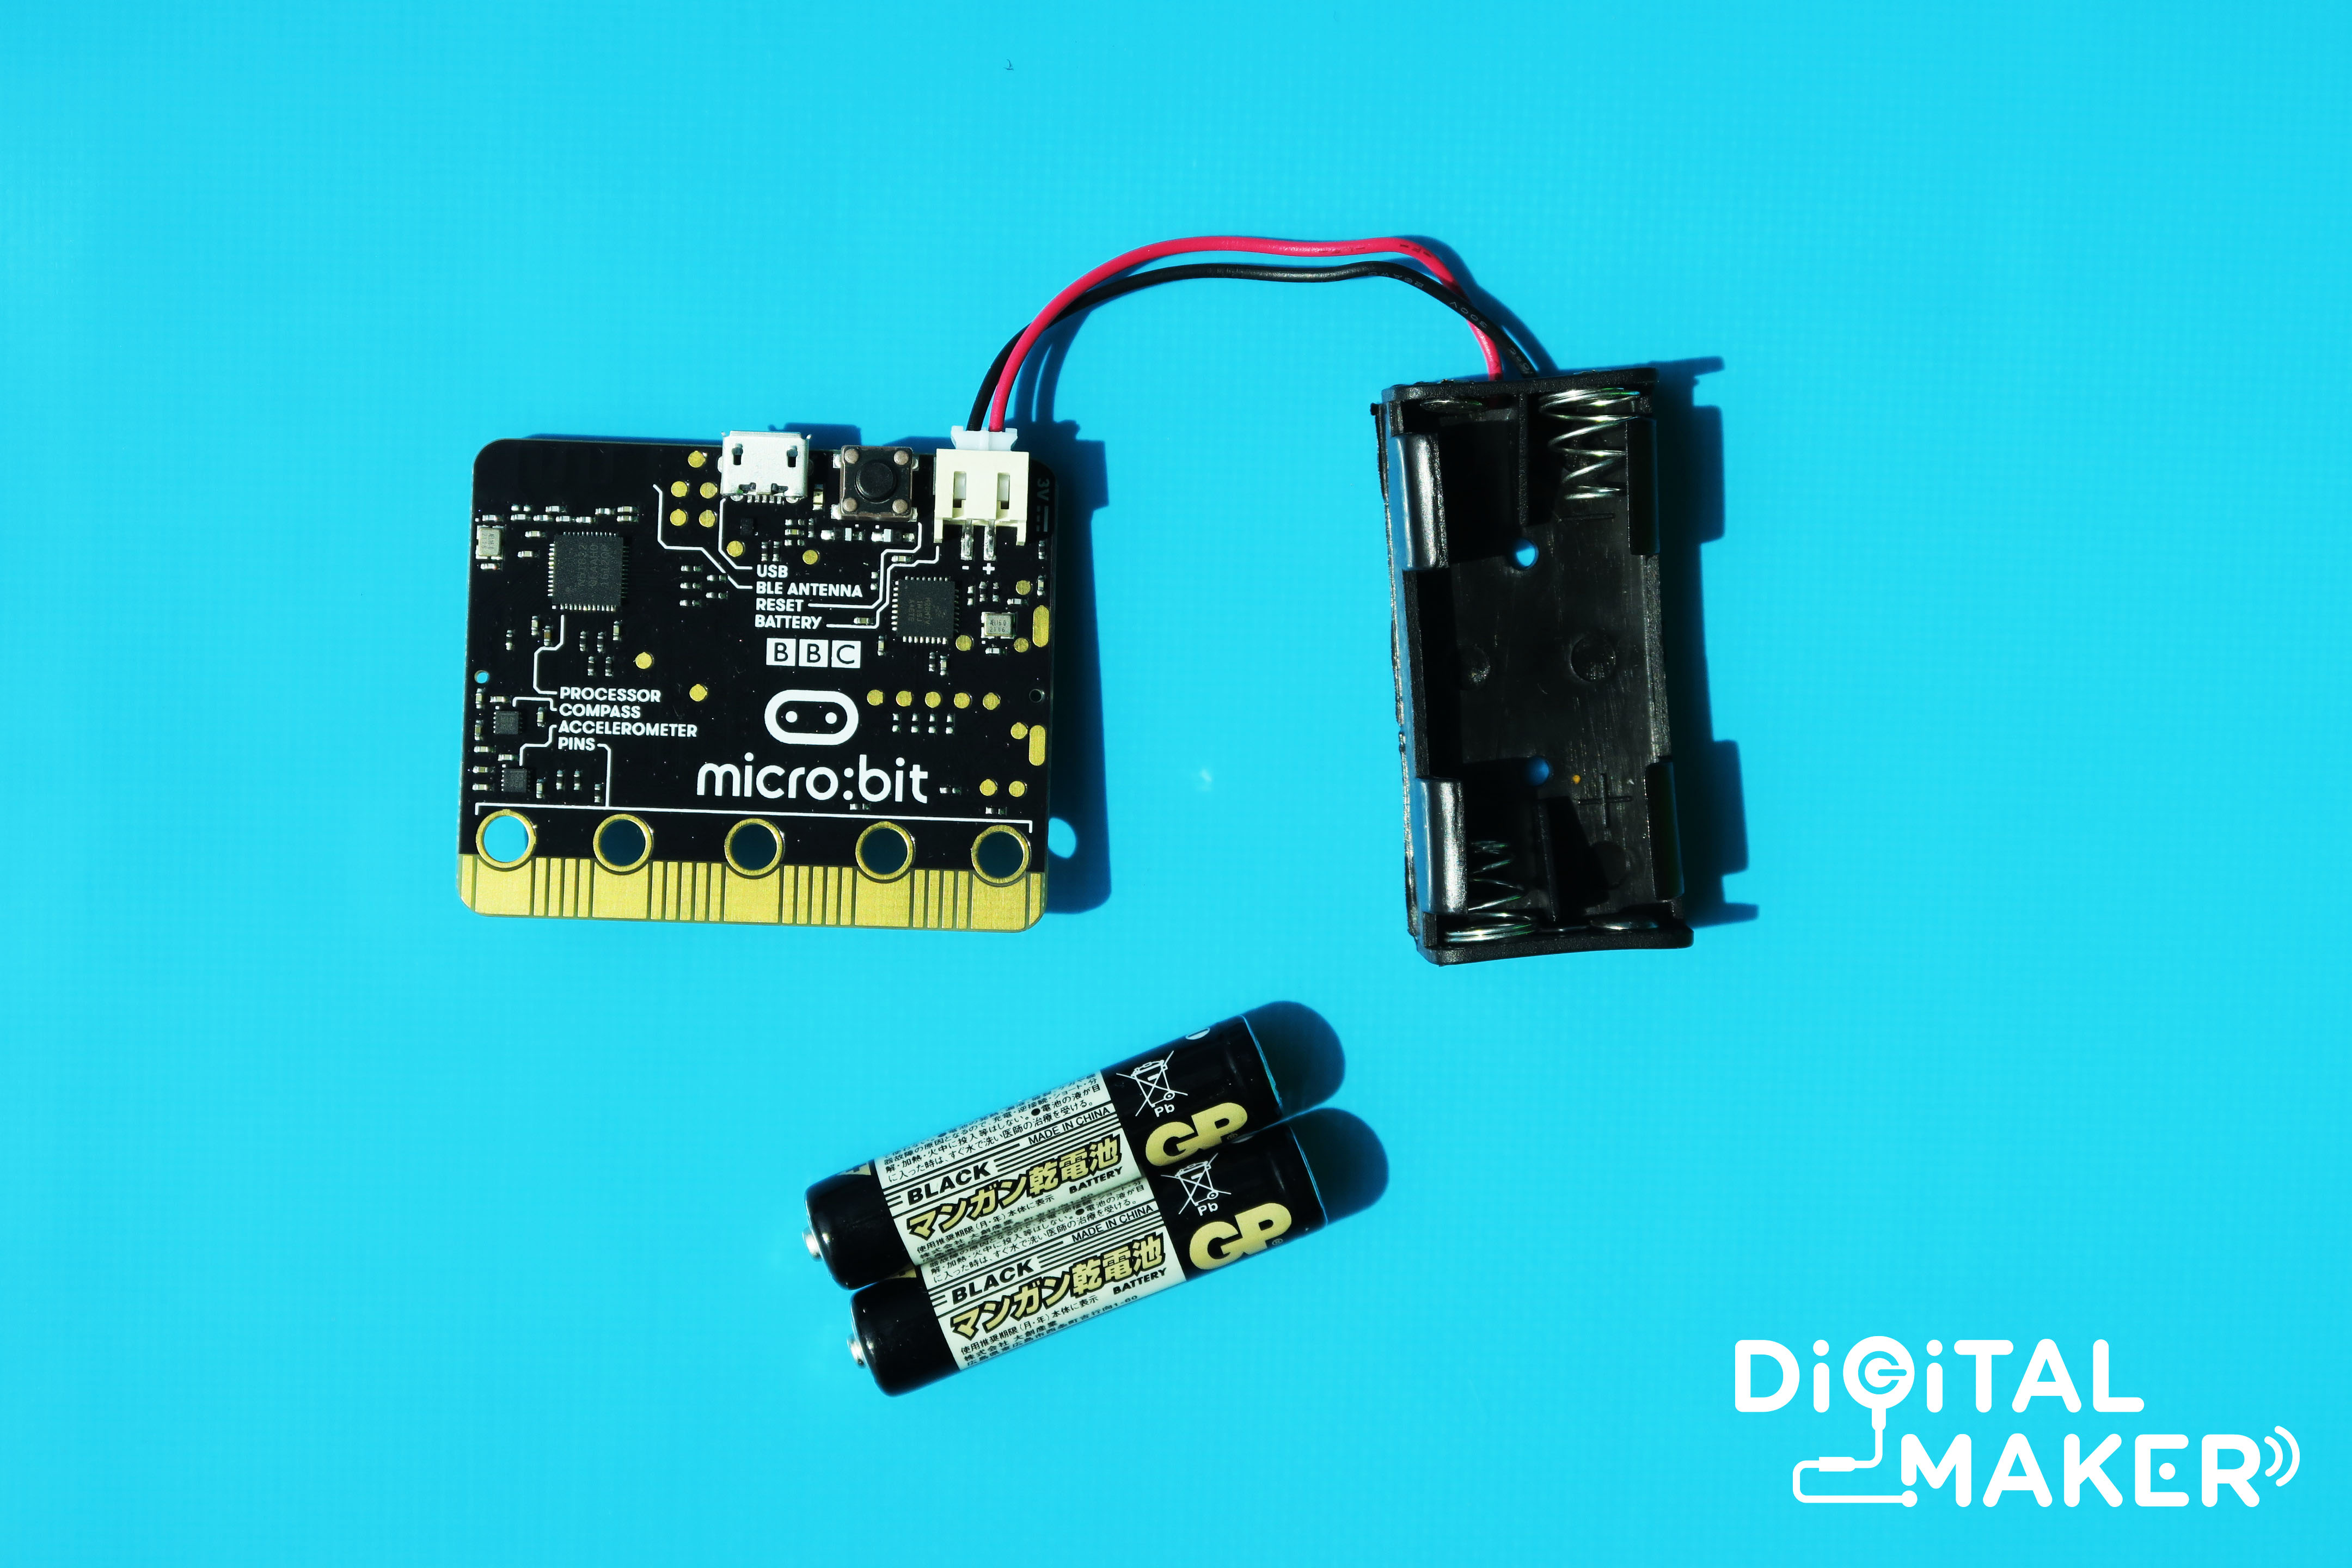
1 x BBC micro:bit
1 x micron USB cable
1 x AAA battery cage
2 x AAA batteries
1 x Scissors
1 x roll of double-sided tape
1 x 3D Printer
2 x meters of paracord
Instructions
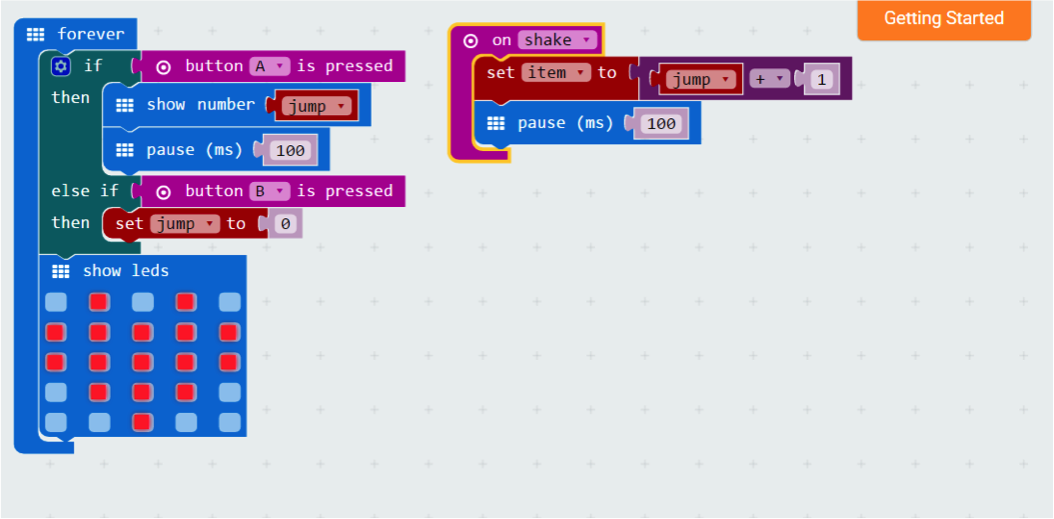
1. Key in script onto the micro:bit
To begin, key in script on the right onto the micro:bit (Launch code editor to access page) The program will count the number of jumps taken each time the device is ‘shaken’ and will be displayed on the micro:bit’s LED screen.
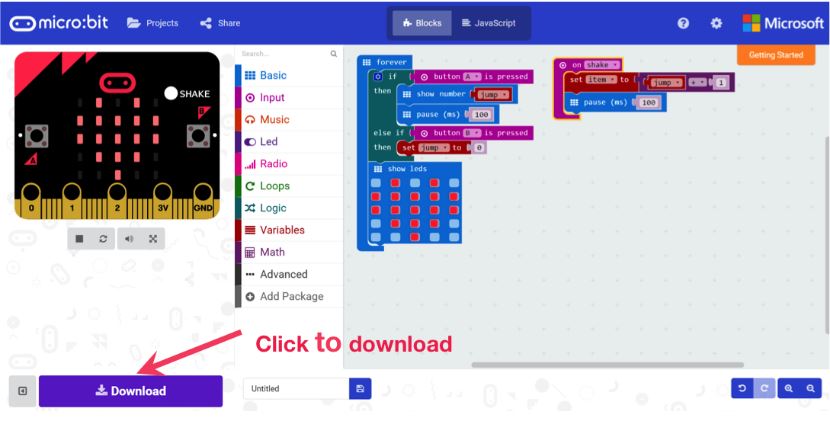
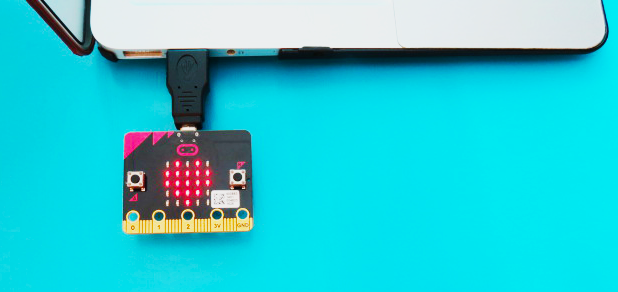
2. Wake up and Download
Plug in the micro:bit to your computer, download the script and upload it onto the micro:bit.
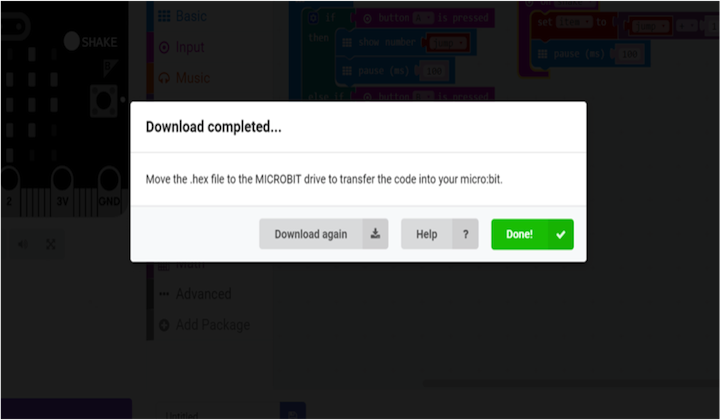
3. Upload Successful
Click done once you see the screen on the right, it means the script has been successfully downloaded to your default Downloads folder.Copy the downloaded script to your micro:bit drive. The downloaded script should end with a .hex extension.
4. Copy and Compare
If the uploading of the script is successful, you will see a heart shape display on your micro:bit’s LEDs.
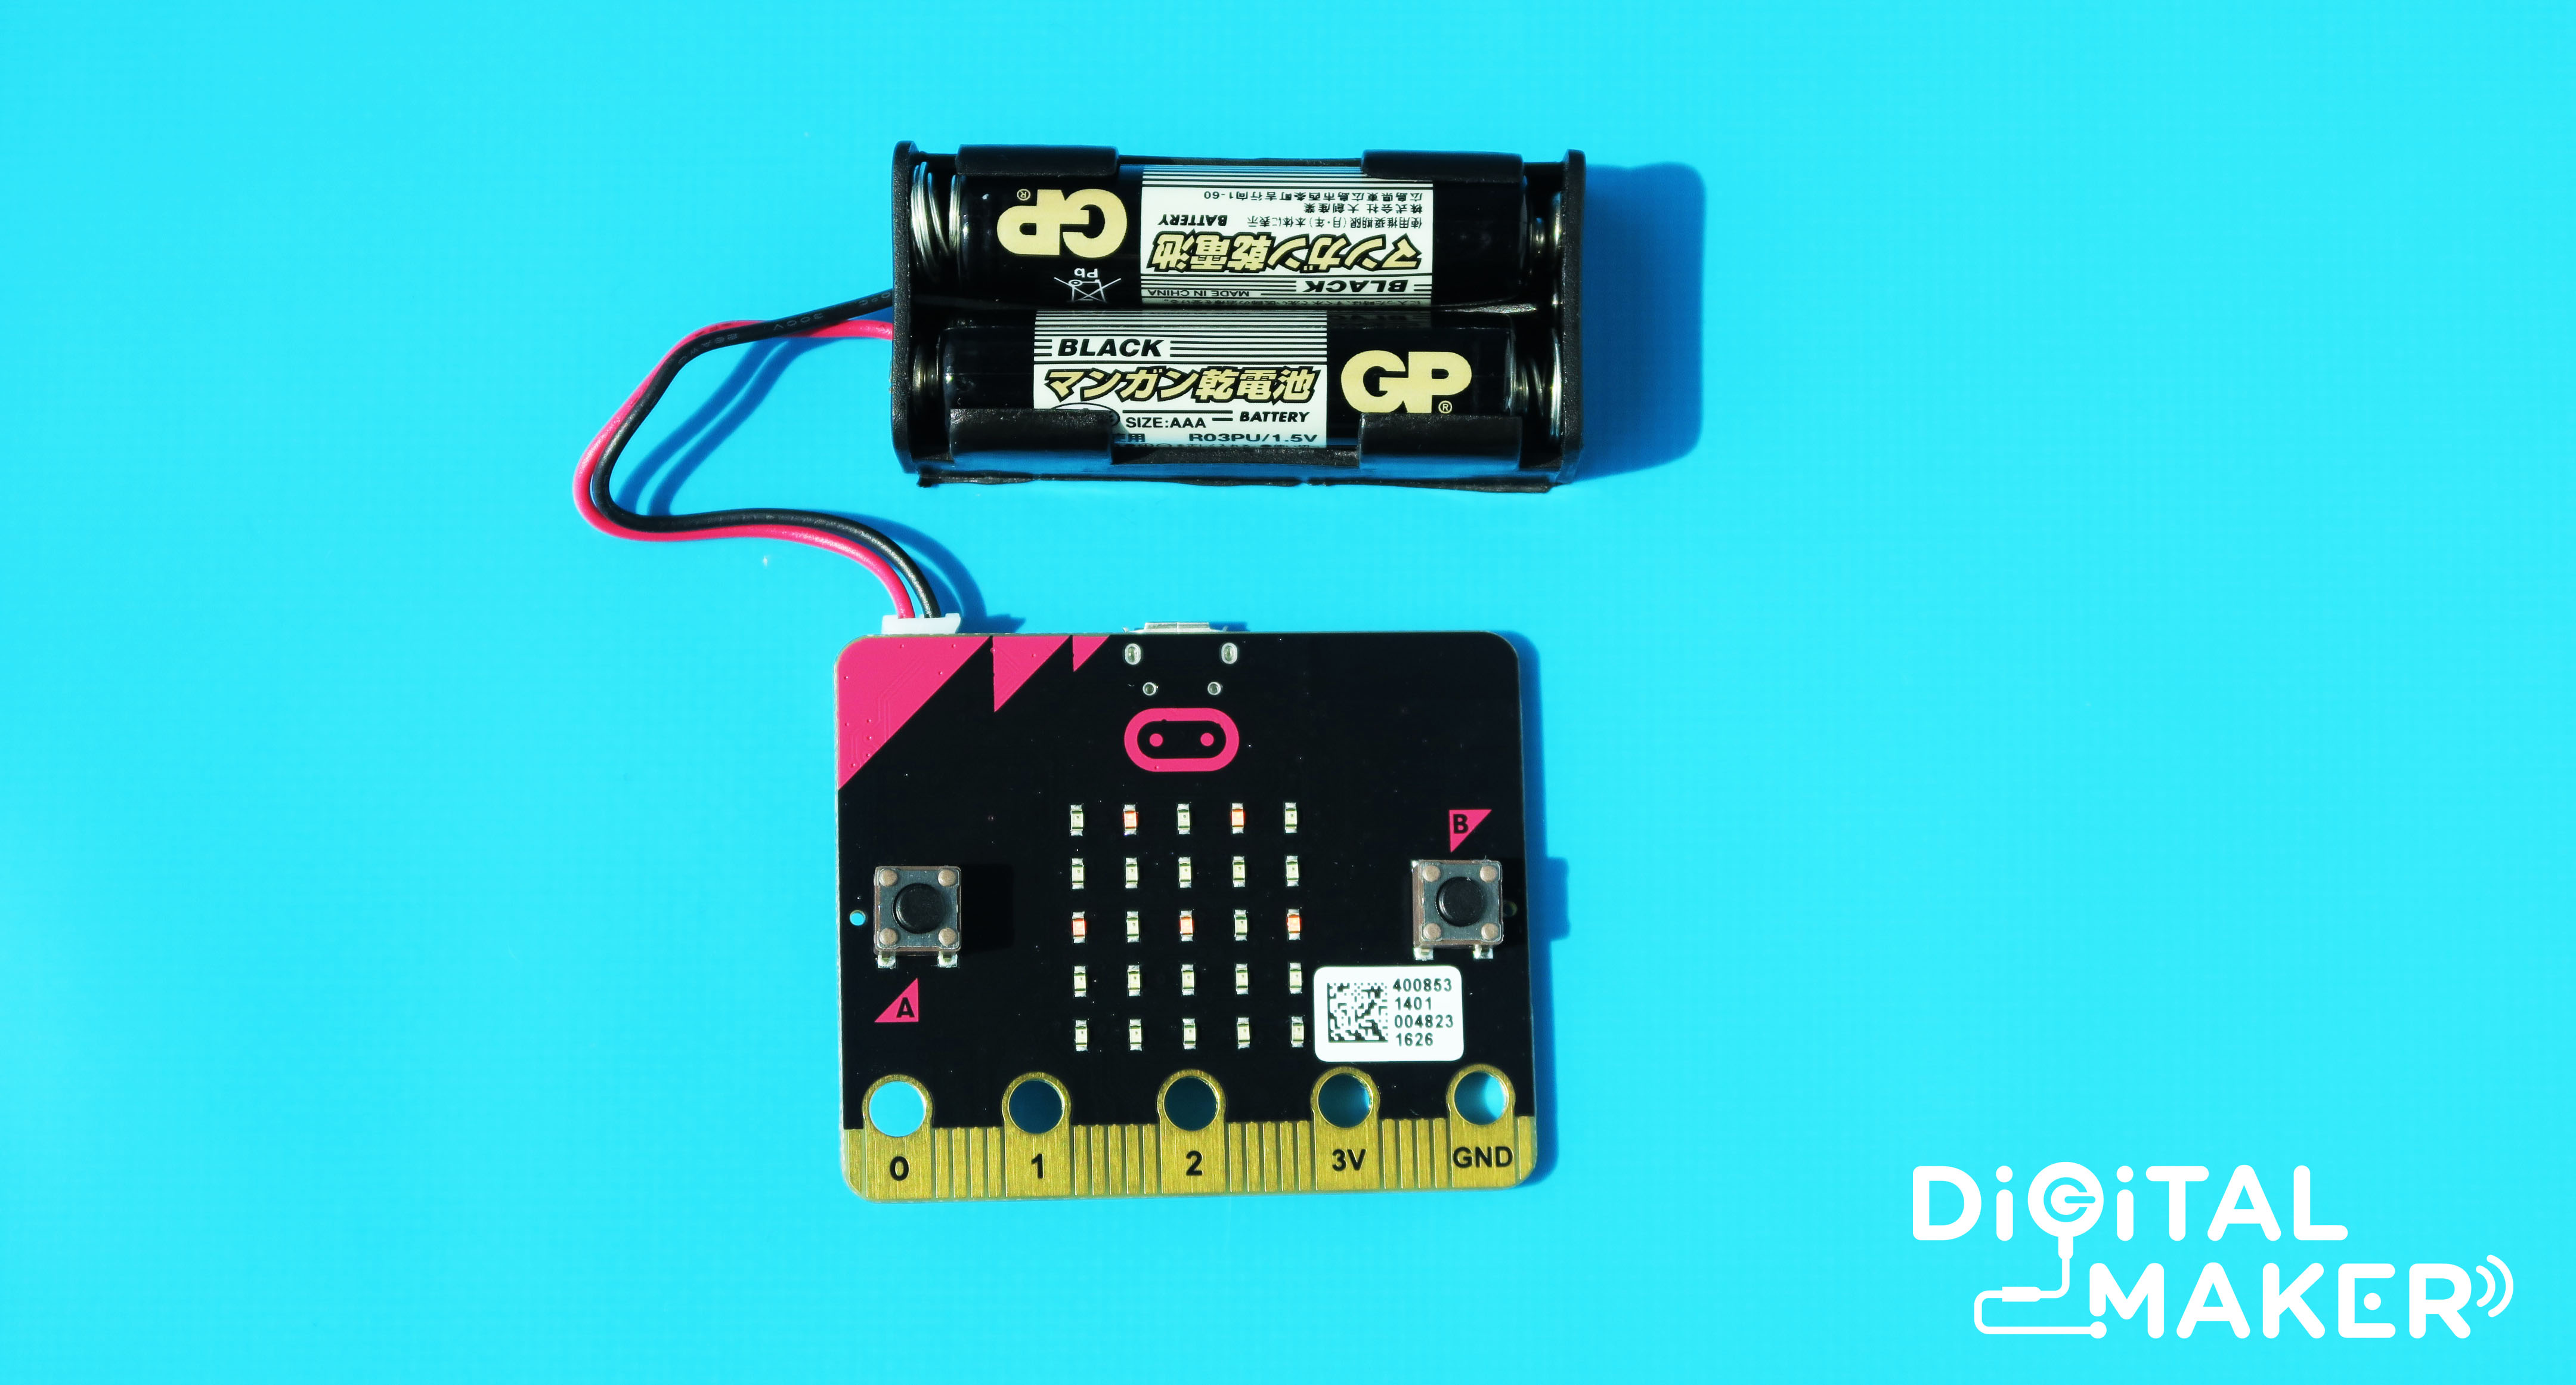
5. Attach
Attach the micro:bit and place 2 AAA battery to the AAA battery holder. The micro:bit should run the program.
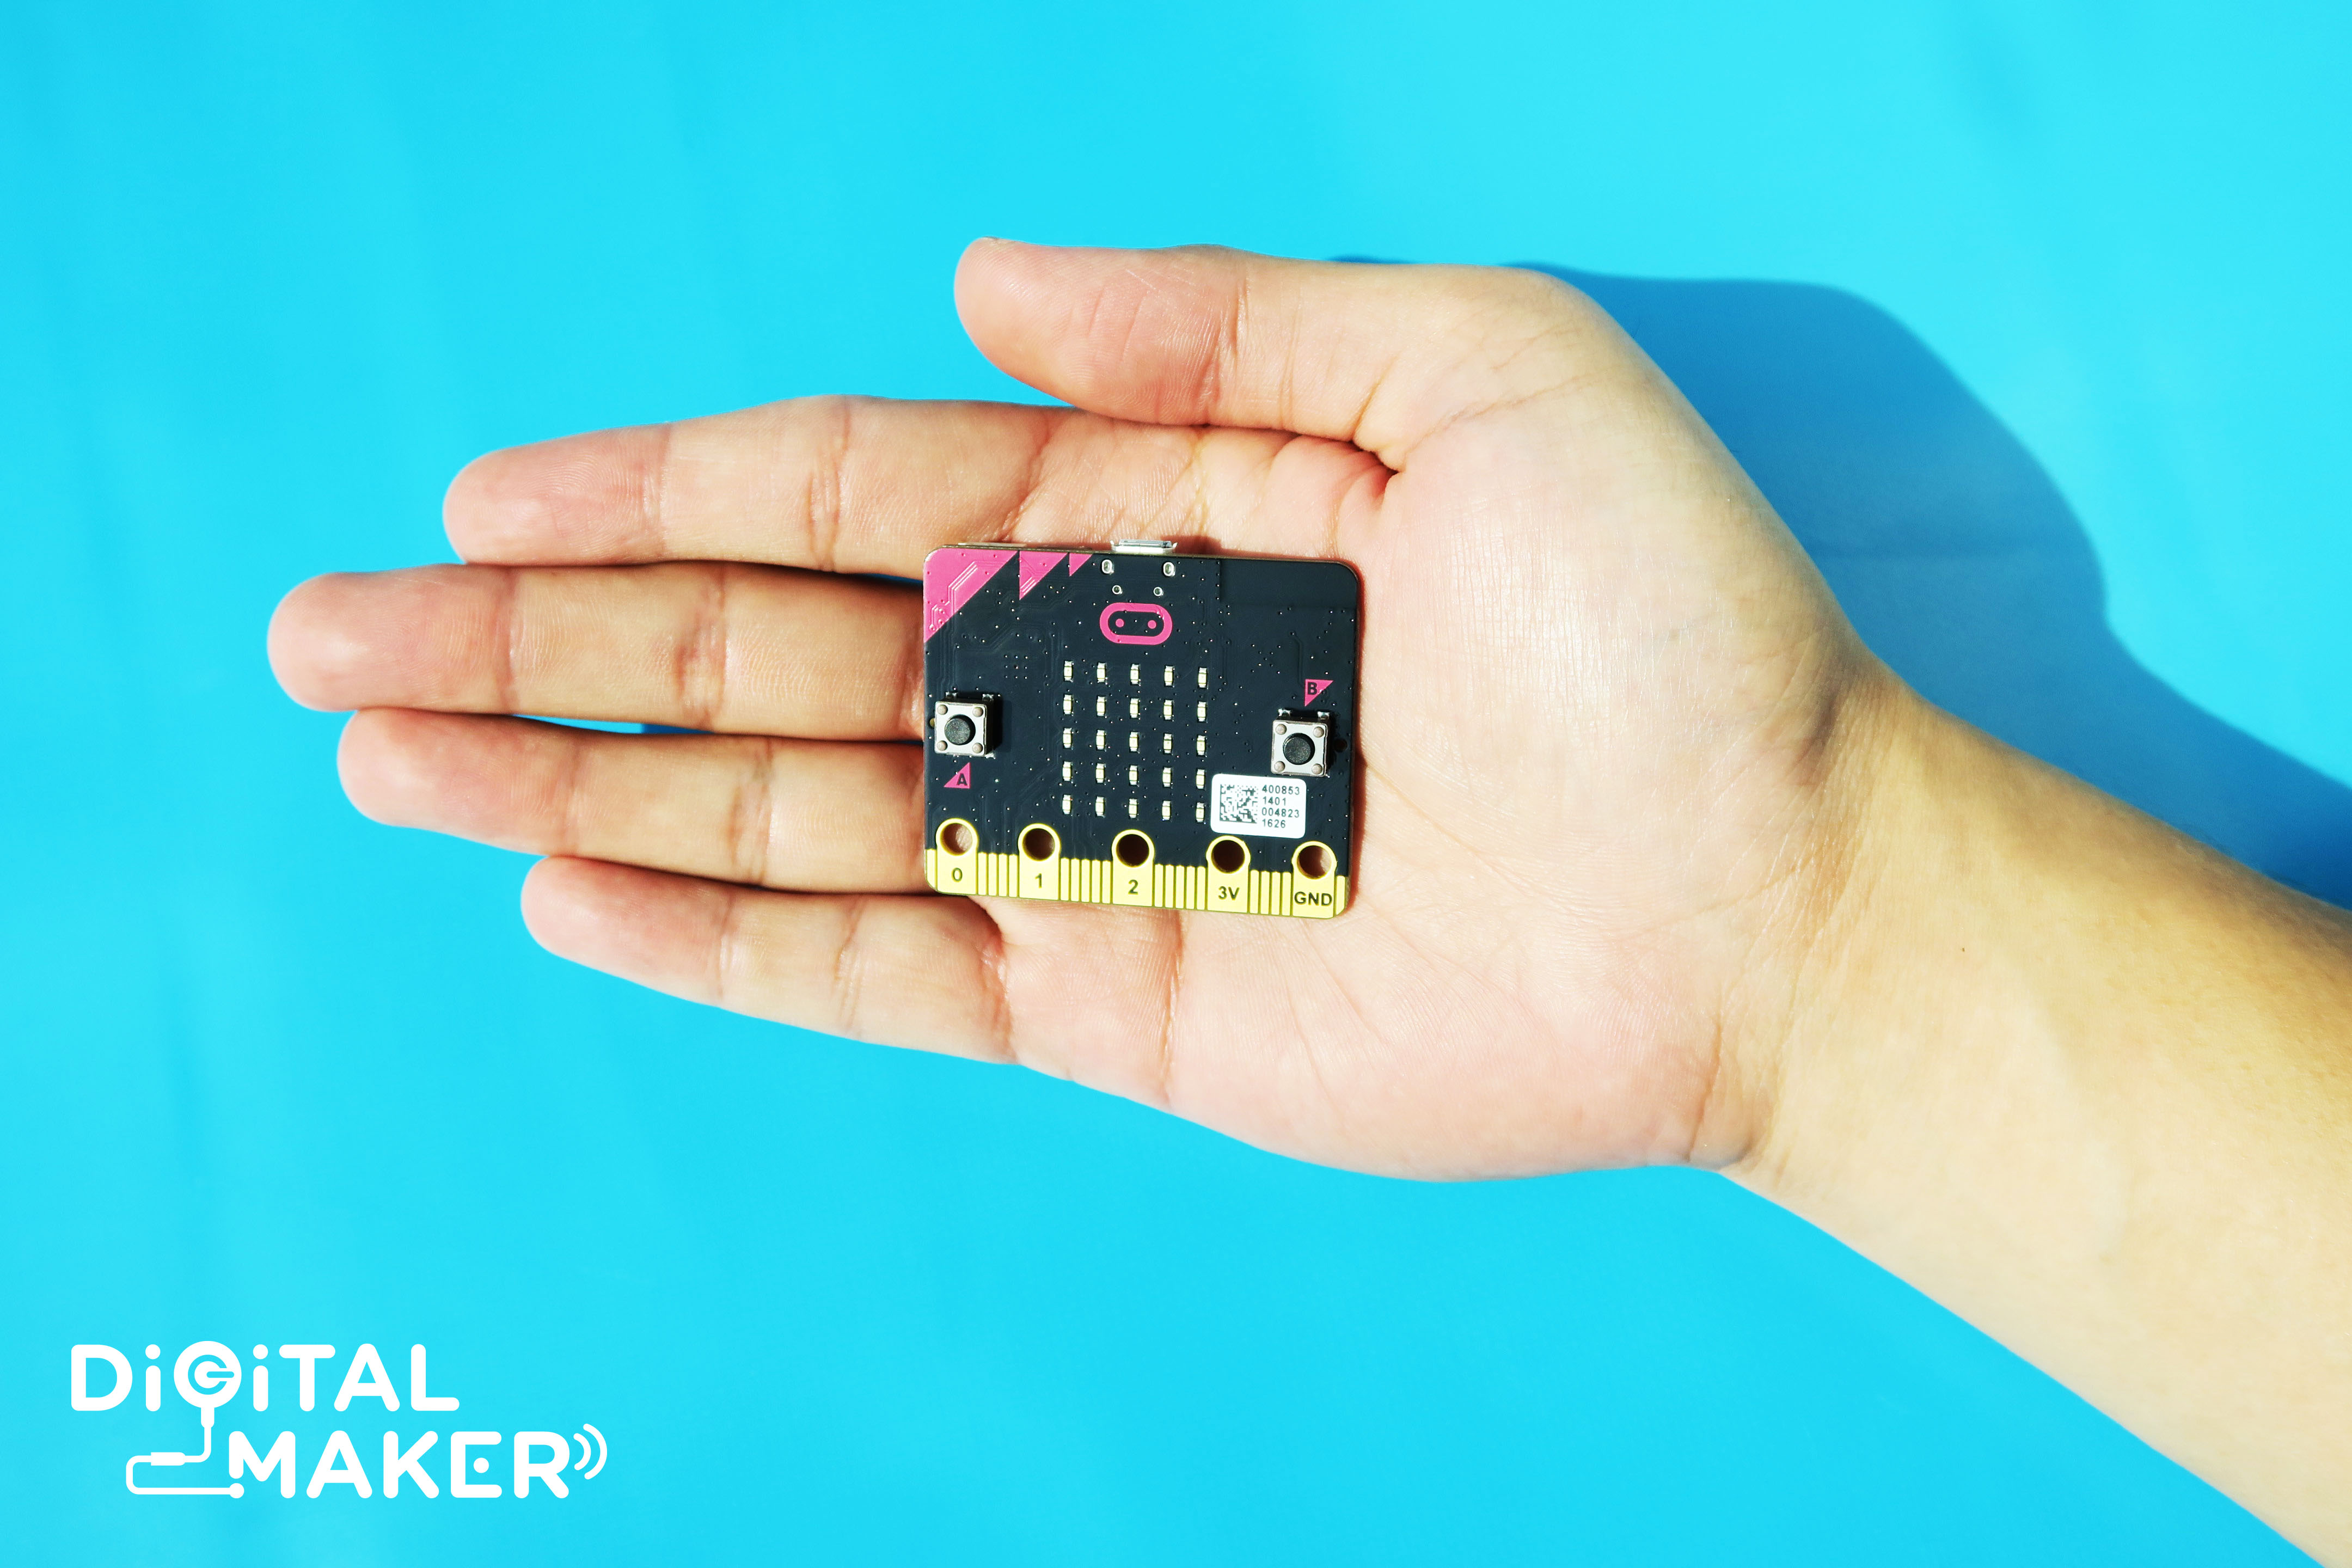
6. Shake
Shake the micro:bit and click the ‘A’ button to display the number of shakes done. Press the B button if you wish to reset. Once done, you may now hold your micro:bit and jump. As you jump, your movement shakes the micro:bit and it records the number of jumps you make.
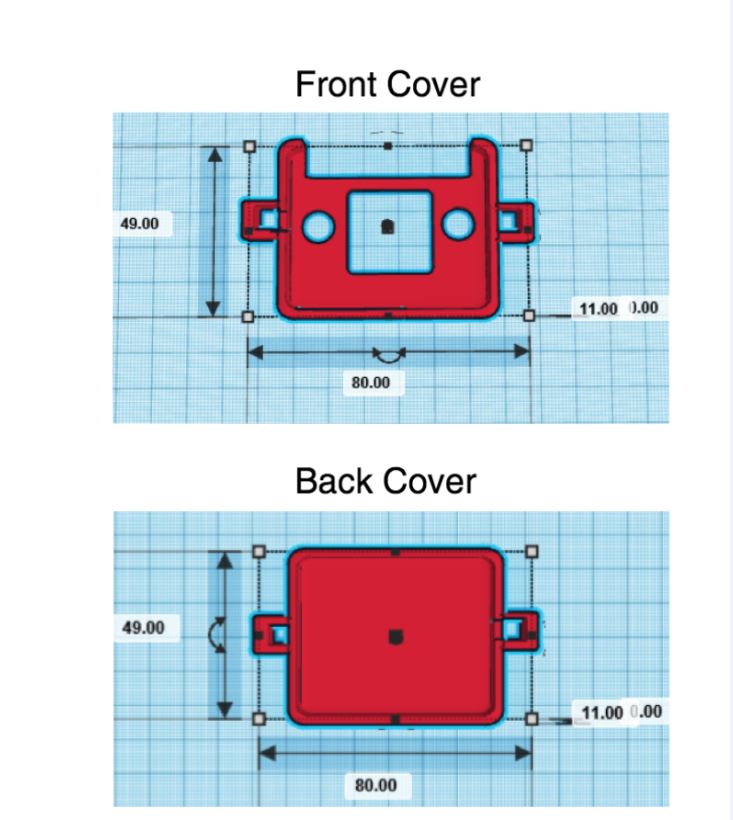
7. Design and Print
Now we are going to make the cover for the micro:bit Jump Rope Counter. We used Tinkercad.com to design the 3D model. You can choose to download the front and back cover from the link in the captions below or follow the dimensions to design your own cover.
Top Cover Wearable
Bottom Cover Wearable
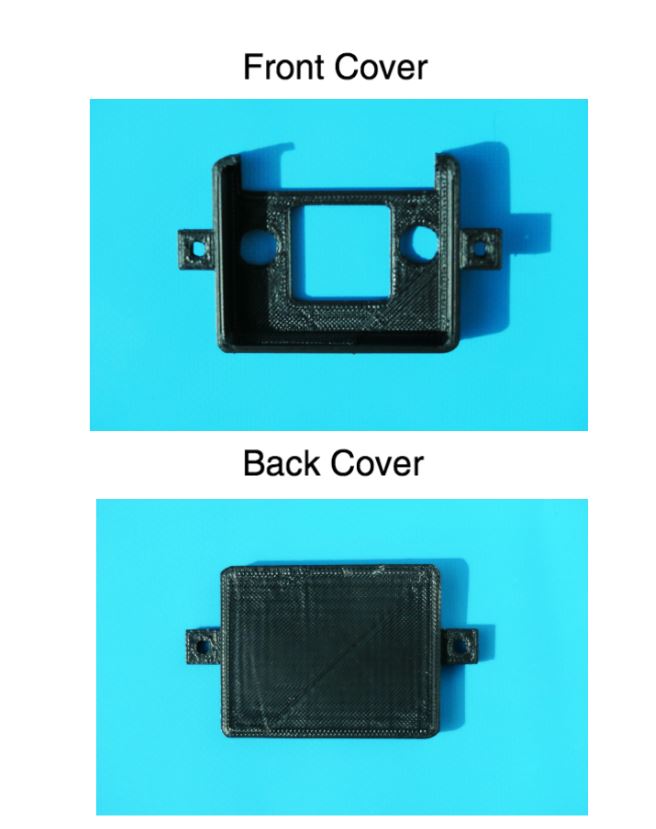
8. 3D Printed
After the 3D printing process is done, wait for a few minutes before removing from 3D printer due to high temperature. Once removed, your 3D printed pieces should look like the ones on the right.
9. Making the Strap
Now we can start to make the strap of the counter. Take 3 paracord straps at length of 50cm. Tie a knot at one end of the straps. Refer to the video on the right for a simple way of weaving. Once done, run the straps through the left and right holes of the micro:bit cover, tie a knot to secure Your strap is now done!
Click here to view: Making the Paracord Strap (DMP)

10. Assembling
Place the micro:bit in the front cover, and ensure that button “A” and button “ B” on micro:bit are flushed with the holes on the micro:bit cover.Apply double-sided tape at the back of the battery holder and paste the battery holder on it.
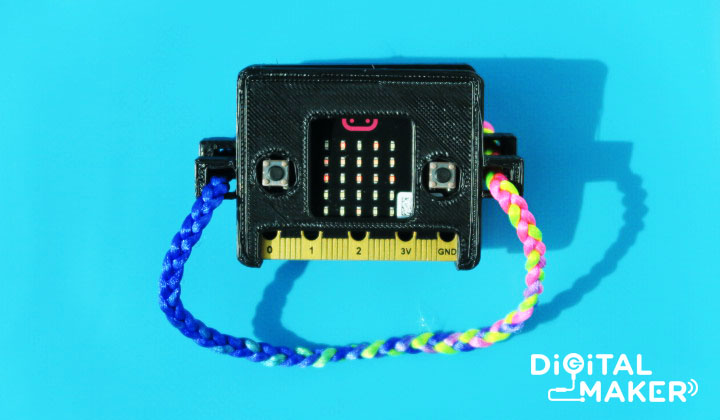
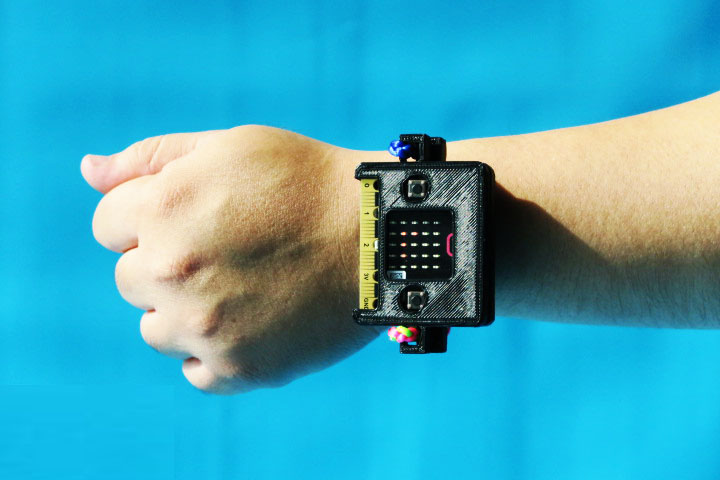
11. End Product
Congrats! Your completed micro:bit should look like the picture on the right! Using the accelerometer sensor on the micro:bit, it will record the number of jumps each time it’s shaken, go test it out now!
Click here to go back to the Digital Maker Projects By Community main page.