

Posty:bit - Post Box Sensor with micro:bit
Contributed by Ferry Djaja
Posty:bit is a post box monitoring system that is built with micro:bit. It has two smart modules that are interacting with each other.
You will need:
2 x micro:bits
2 x battery holders
4 x AAA batteries
2 x USB connectors
1 x PIR sensor (SEN-02046 or DYP-ME003)
3M double sided tape
Instructions

1. Transmitter and Receiver
Transmitter
We need to put the Transmitter in your mail box to monitor any incoming mail from the postman. It has a PIR sensor to detect any movement in the box. You need to put the Transmitter on one of the side inside the box. See Installation section for more details.
Receiver
You need to carry a Receiver in order to check your mail box. Once you pressed the button A on the micro:bit, it will check if there is a mail in your box and it indicates the above LED status:
2. Build The Transmitter
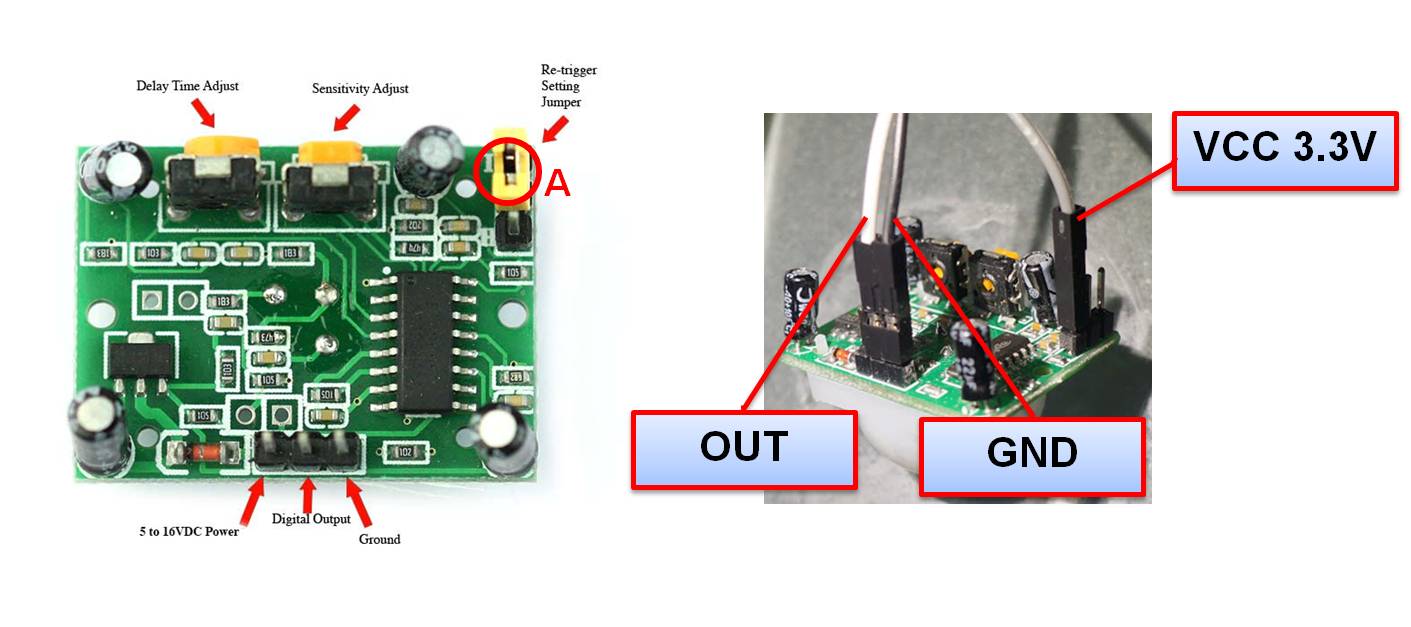
Because our PIR sensor runs at 5V, we need to do some hacking to work with micro:bit. Remember micro:bit input voltage is 3.3V.
Instead of using the normal VCC 5V pin, we will use the VCC 3.3V pin as highlighted in point A. The final connectivity is shown in the above picture.
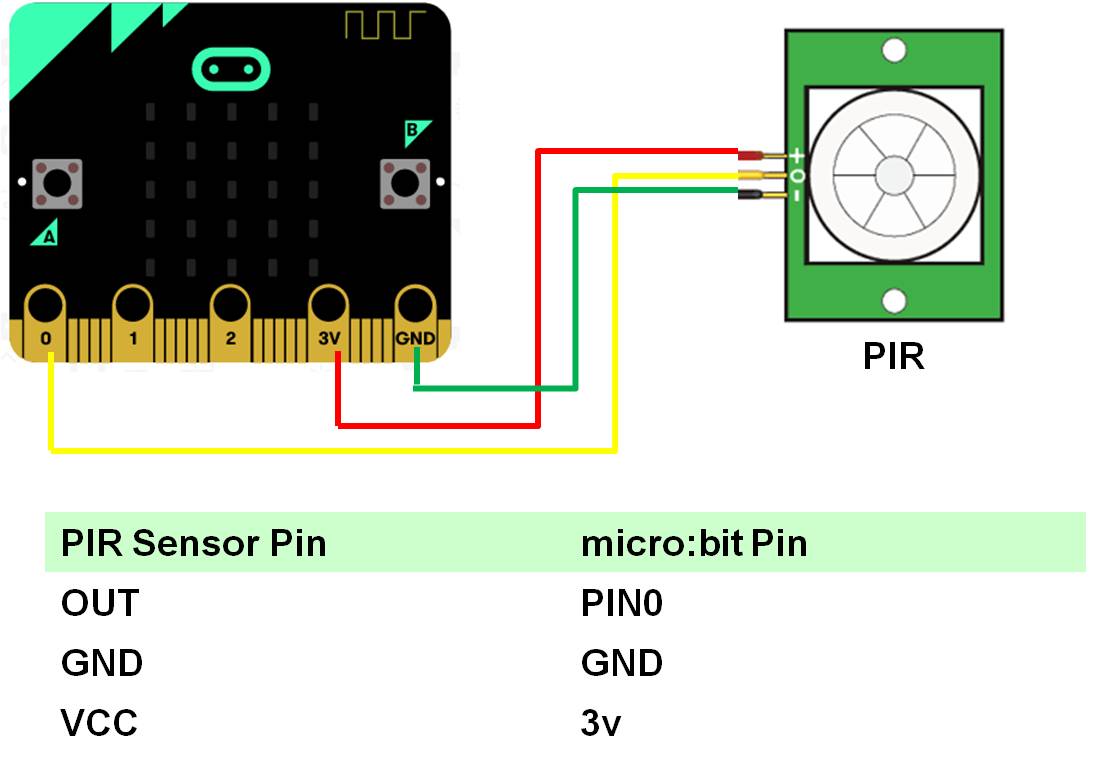
3. Attaching the PIR sensor
Hook up the PIR sensor to the micro:bit as shown in the image.
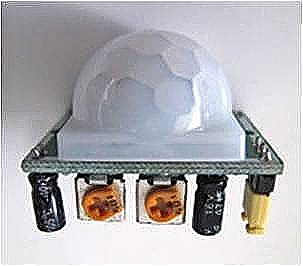
4. Adjust the sensitivity of PIR sensor
We need to adjust the sensitivity and time delay on the PIR sensor. Turn both orange dials anti clockwise as far as they will go. This will set the motion sensitivity to its least sensitive setting and time delay between sensing the shortest possible interval.
5. Build The Receiver
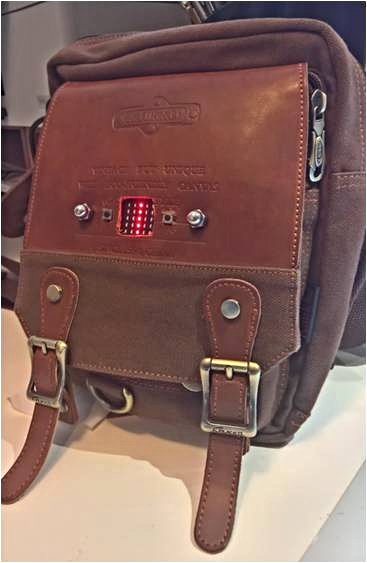
As there is no external component attached to the Receiver, actually there is nothing to build, it is only the micro:bit itself that you need carry in order to check your mail !!. As an illustration, you can attach the receiver onto your bag (like the below picture). The bag will tell you if there is a mail!
6. Upload the HEX file onto the JavaScript Block Editor
I have attached the Transmitter and Receiver HEX files above, so you can learn the logic and may modify to enhance the functionality. For those of you who do not wish to learn how to code is written, you may just download the HEX files and transfer it onto your micro:bits, and skip to Step 11.
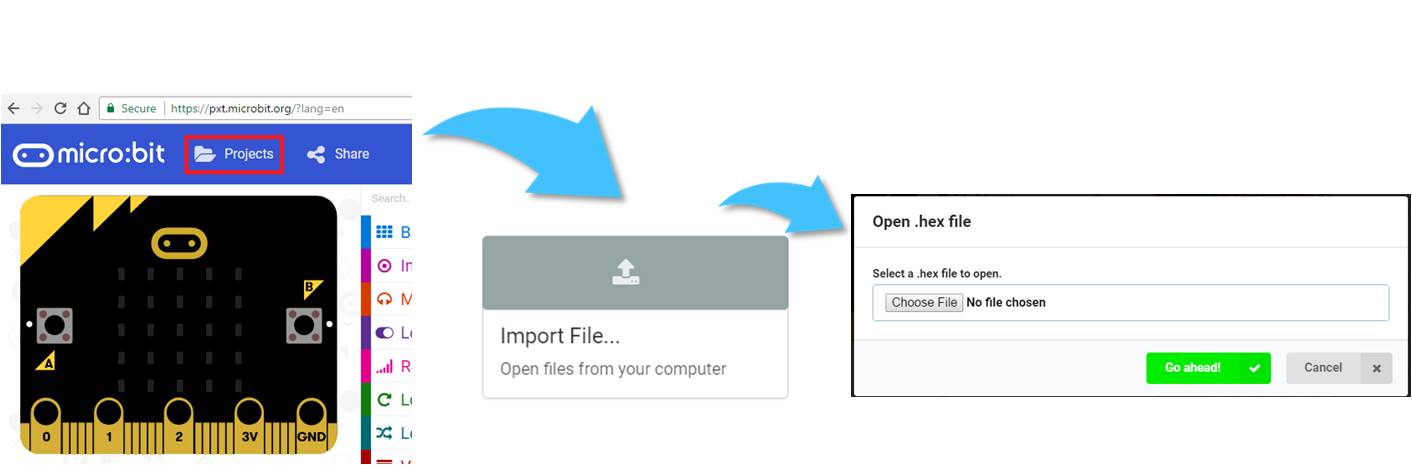
For those of you that are interested in the code, upload the HEX file onto the Javascript Block Editor by clicking on the “Open Projects” tab and point the code editor to import the HEX file. Move on to Step 7.
7. Explanation of how Transmitter works
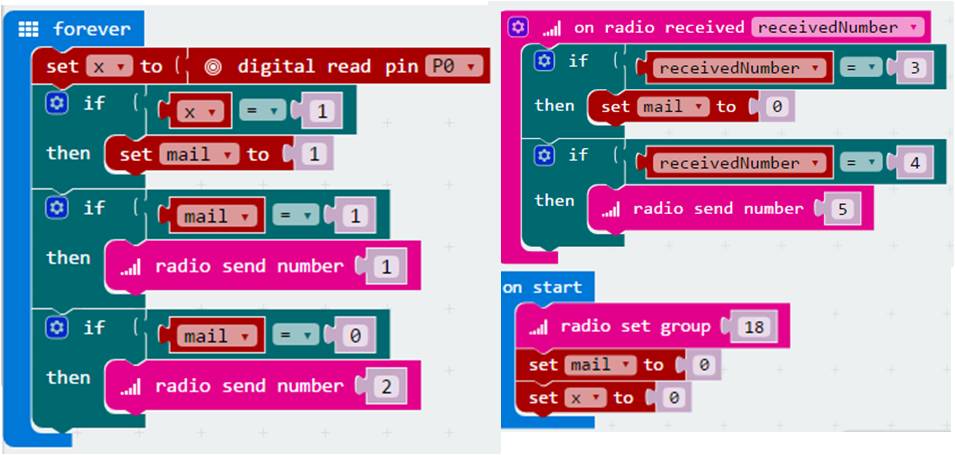
The Transmitter has a PIR sensor attached to digital pin P01.
The program is keep monitoring in-cycle the value of digital pin P01, if the value is high (1) - assuming the mail is in the box, it will notify the Receiver on the incoming mail from the postman by sending a certain value via the radio frequency group 18.
Notice that variable mail = 1 indicates mail has arrived, mail = 0 indicates no mail. If the radio receives receivedNumber= 3, it acknowledges the user has checked the status (the button A on the receiver was pressed).
If the radio receives receivedNumber = 4, it will tell the Receiver that Transmitter is still alive. This is important to make sure the Transmitter is working as expected.
8. Explanation of how Receiver works
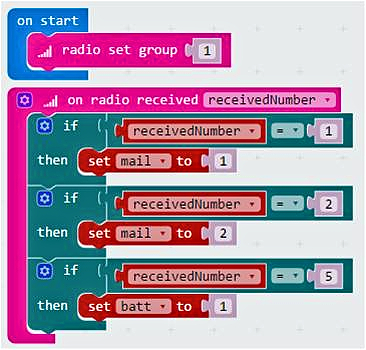
The Receiver has a radio function on the group 1 that monitors the incoming values from the Transmitter.
If receivedNumber = 1, indicates the mail has arrived (mail = 1)
if receivedNumber = 2, indicates no mail (mail = 2)
if receivedNumber = 5, indicates Transmitter is still alive and within range (batt = 1)
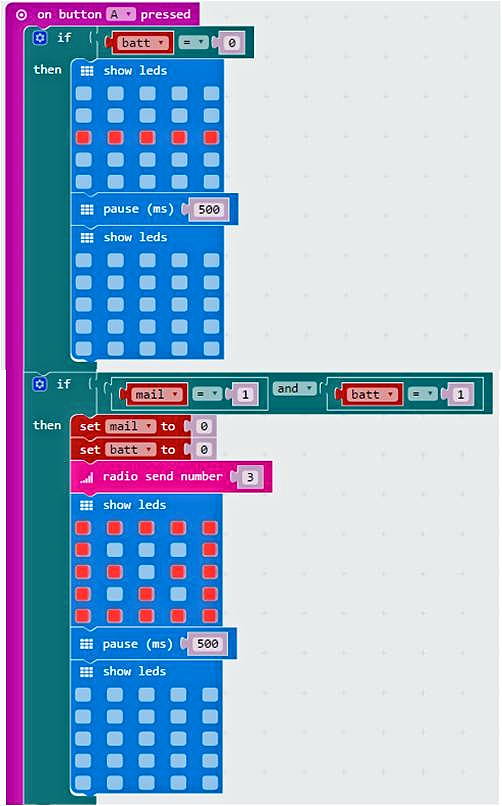
9. Overall explanation for how PostyBit works
Within  block:
Check if Transmitter battery has gone flat or out-of-range and let user know by showing the LED status:

Check if the mail is in the box and let user know by showing the LED status:
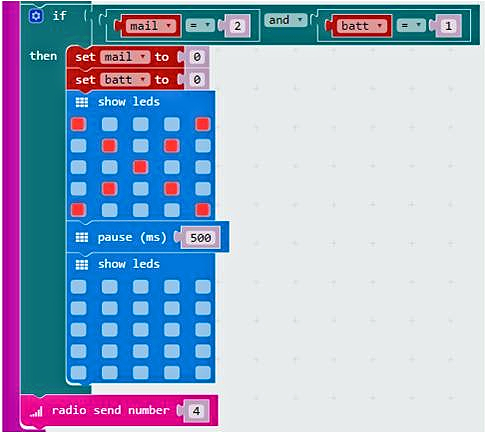
10. Overall Explanation of how PostyBit works - Part II
Within  block:
If there is no mail, let user know by showing the LED status:

Do a ‘ping’ to Transmitter to make sure it is alive and responding.

11. Let’s upload the program to micro:bit!
You need to download each program for transmitter and receiver and upload to micro:bit. Click done once you see the below screen, it means the script has been successfully generated and downloaded to your default download folder.
Drag the downloaded script for transmitter and receiver and drop it onto your micro:bit drive. The downloaded script should end with a .HEX extension. We will have two HEX files, one is for transmitter and the other one is for receiver.

12. Install the Transmitter
Put your Transmitter in your mail box in such a way if the postman put the mail in your box, the PIR sensor can detect. I use double-sided tape on the back of the wood and stick the Transmitter as shown in the below image.
13. Project Complete!
Well Done! Project Complete !!!
Did you enjoy making this project?
Click here to go back to the Digital Maker Projects By Community main page.