

Thirsty Plant Auto Watering System
Contributed by Joshua Teo
Have you ever wanted to keep a potted plant, but are worried that you might be forgetful sometimes or simply not have the time to water your plants? Well fear not! This Micro:Bit helps to keep your plants watered for you!
You will need:
1 x A plastic container of any size or shape you want (for this example, I have used a small circular one.)
1 x micro:bit
Some wires
1 x Transistor
1 x Soil moisture sensor
1 x Water pump
1 x Flexible pipe (The pipes and the pump can be bought from aquarium shops)
2 x batteries and a corresponding battery holder (preferably waterproof)
Instructions

1. Coding the micro:bit
Key in the following code in the JavaScript Block Editor.
The values of the “if(moisture < x)” and the pauses to determine watering intervals can be changed to suit the needs of the plant.
The “forever” loop that displays the moisture as a rough percentage every second may also be removed to save battery life.
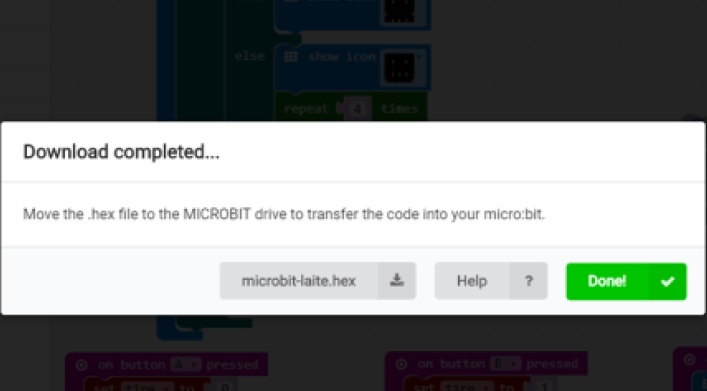
2. Uploading the HEX file onto the micro:bit
Save the HEX file onto your computer and copy it to your micro:bit drive. This will upload the program to your micro:bit.
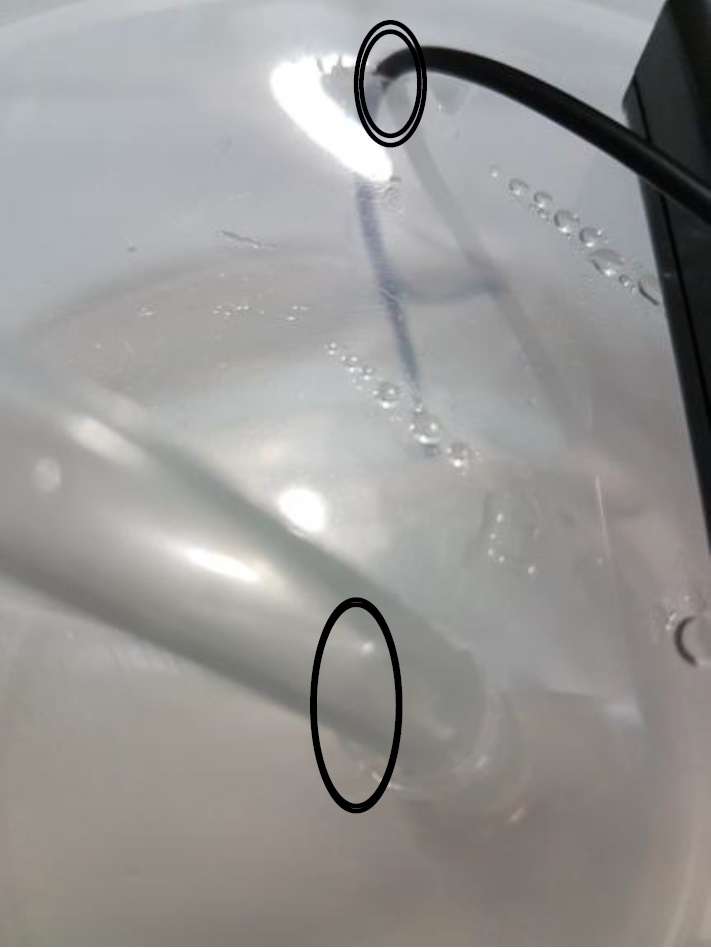
3. Creating the plastic container
Cut a hole in the cover of the plastic container. The circle in the center of any common plastic container should be large enough to accommodate for the pipe. Then cut another hole to allow the wires into the container.

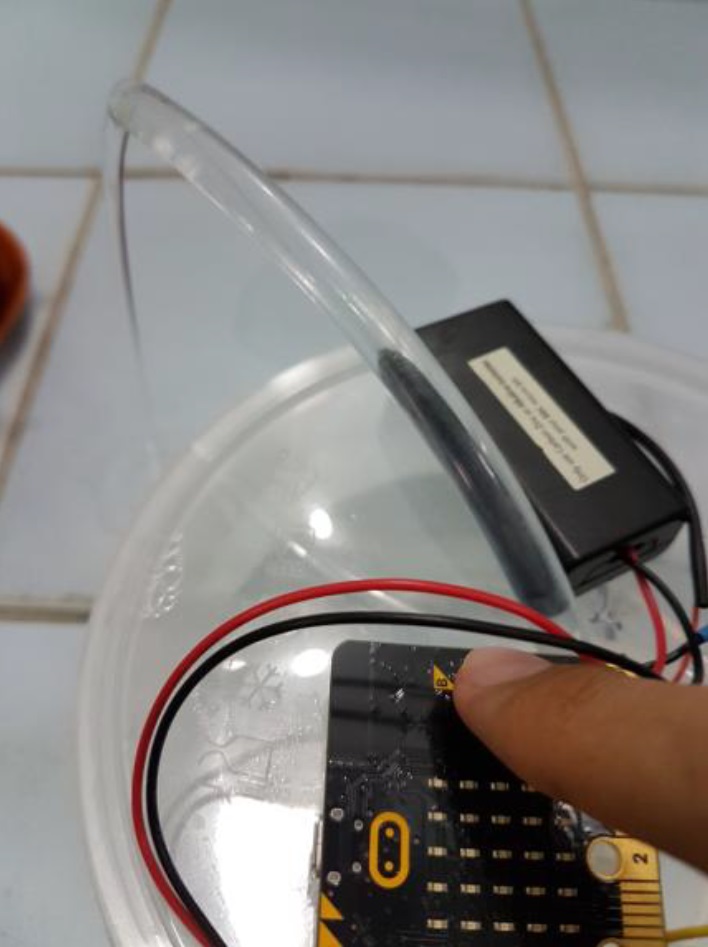
4. Attaching the pump
Place the pump inside the container and put the pipe through the center hole and the wires connected to the pump through the other.
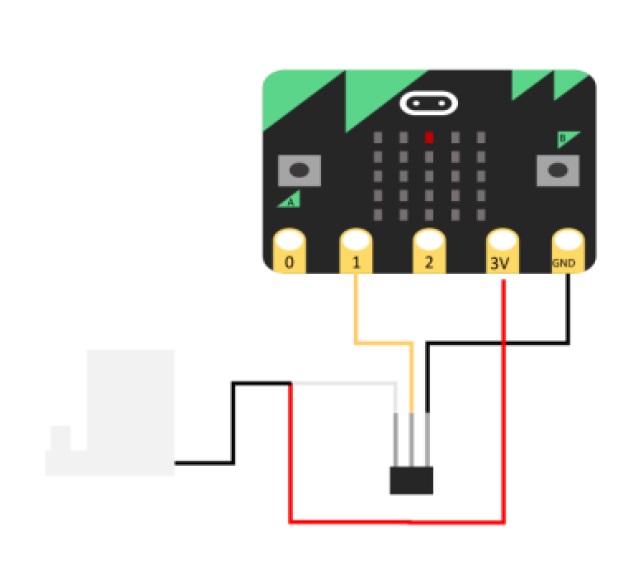
5. Connecting the wires to the micro:bit
Connect the wires accordingly. The gray component on the left is the pump. The black rectangular component in the centre is the transistor. Connect the base to your desired output pin, the collector to the pump and the emitter to the ground pin.
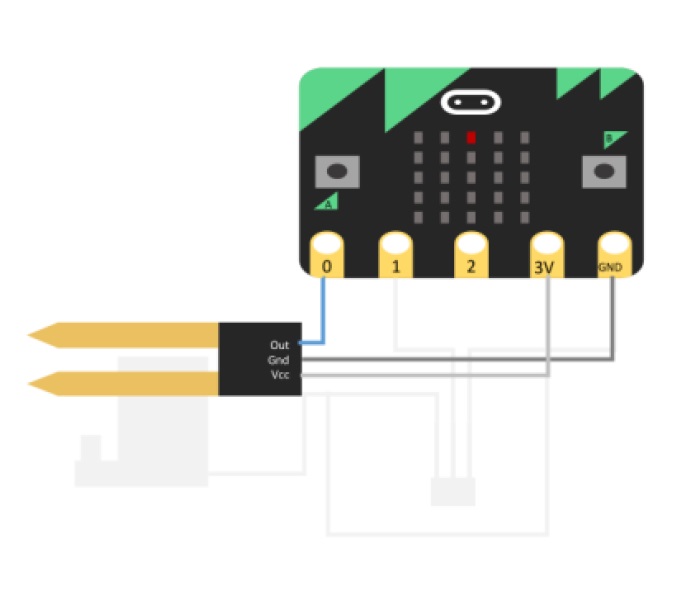
6. Connecting the soil moisture sensor
Connect the soil moisture sensor as follows and place it in the plant pot.
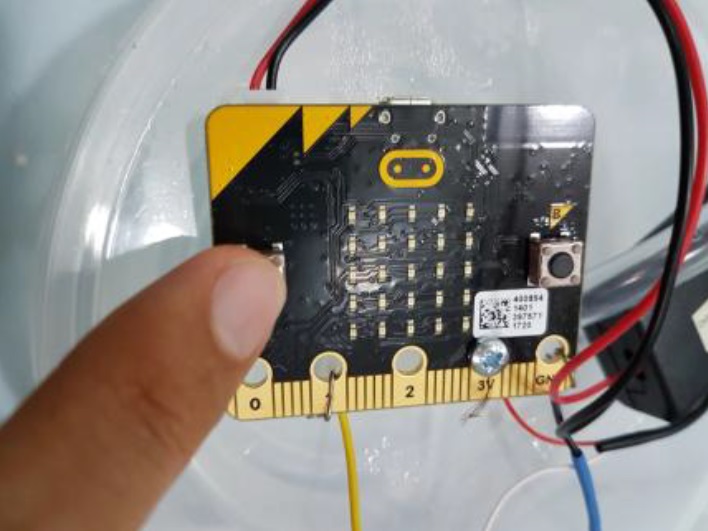
7. Connecting the battery pack
Connect the battery pack to the micro:bit and then press the A Button to start the cycle.
8. Fill the container with water
The program should loop automatically now. All you have left is to keep the container filled with water.
9. Press B to dispense one portion of water if needed
If at any point you feel like the plant is receiving insufficient water, the B Button dispenses one portion of water.
10. Project complete!
Congratulations!
Your auto-watering Micro:Bit is complete! Now you can rest easy knowing your plant will not go thirsty! Happy gardening!
Click here to go back to the Digital Maker Projects By Community main page.